
I am officially obsessed with these strawberry rhubarb hand pies. The filling is to die. It’s fruity and sweet and a little bit tart. The pastry is rich and buttery. I ended up making them twice this week and both batches disappeared very quickly. I’ve had to restrain myself from making a third batch!
I received a bunch of rhubarb from a co-worker and was thinking about what to make with it. Strawberry rhubarb pie is always a classic, and it’s one of my favourite desserts, so pie seemed like a logical thing to make.
One of the downsides with pies is they aren’t a very portable dessert. I mean, yes you can easily move a pie around in its pie dish, but you need to keep it upright. Then you have to cut it into slices and serve them. A slice of pie needs to be eaten on a plate. You can’t stack pies on top of one another without making a giant mess. But hand pies are a whole other story! They’re much more portable and easier to pack!
I looked around online for some hand pie recipes and came across this one from Yummy Addiction. I was excited to try it primarily because it sounded straightforward and easy to follow, but also because the pastry recipe uses eggs, and I haven’t tried a pie crust recipe with eggs before. I was curious to compare it to the other recipes I’ve tried.
The filling was super easy to make and absolutely delicious. The dough also comes together easily, but the finicky part is when you start actually assembling the little pies.
As I mentioned earlier, I tried making these twice, partly because they were delicious, but also because I wanted to try a few different techniques with the pie dough to see if I could find the knack to assembling them. Here’s how it all went down!
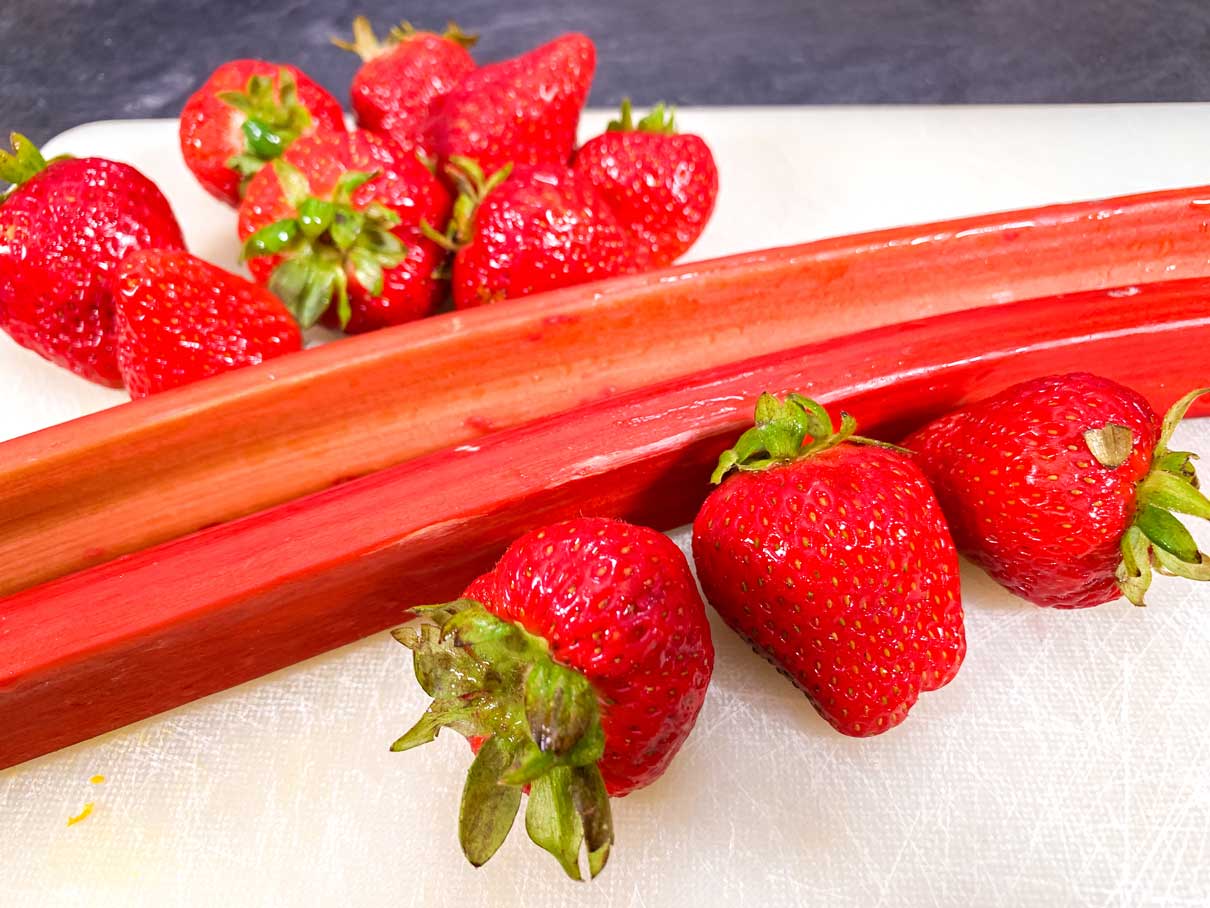
I started with the filling. This is super straightforward. Chop up your strawberries and rhubarb into pieces that are quite small. Since the pies are tiny, you want tiny pieces of fruit, otherwise it will be hard to get the mixture to fit into the pies.
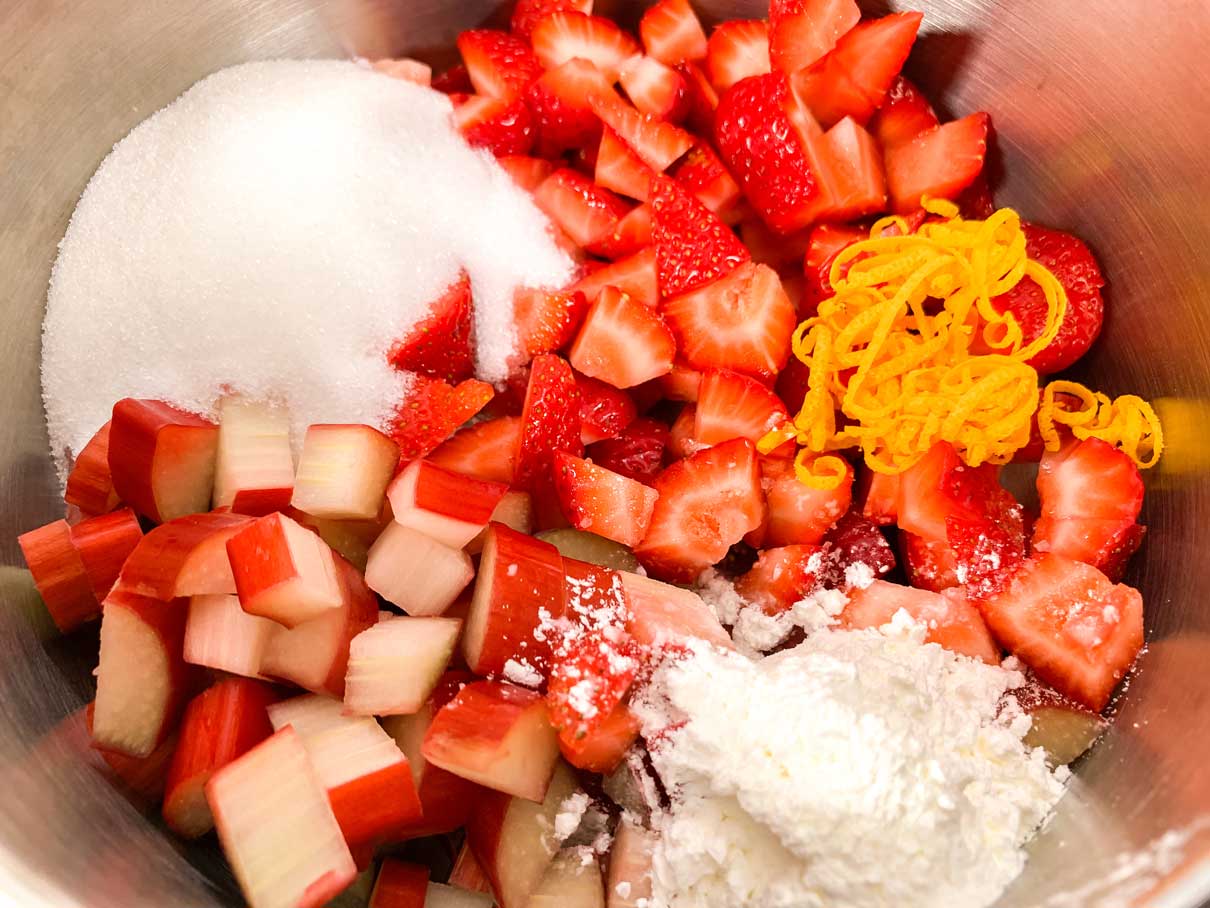
Combine the strawberries, rhubarb, sugar, cornstarch, some fresh orange zest and a pinch of salt in a small saucepan.

Cook the mixture over medium heat, stirring constantly, for about 6-8 minutes until thick and bubbly. The mixture will seem too dry at first, but the fruit will quickly start to release its juices as it warms up. Be sure to keep stirring and don’t walk away from your pot. The mixture will go from being quite wet and runny looking, to being very thick all of a sudden, so you want to keep a close eye on it.
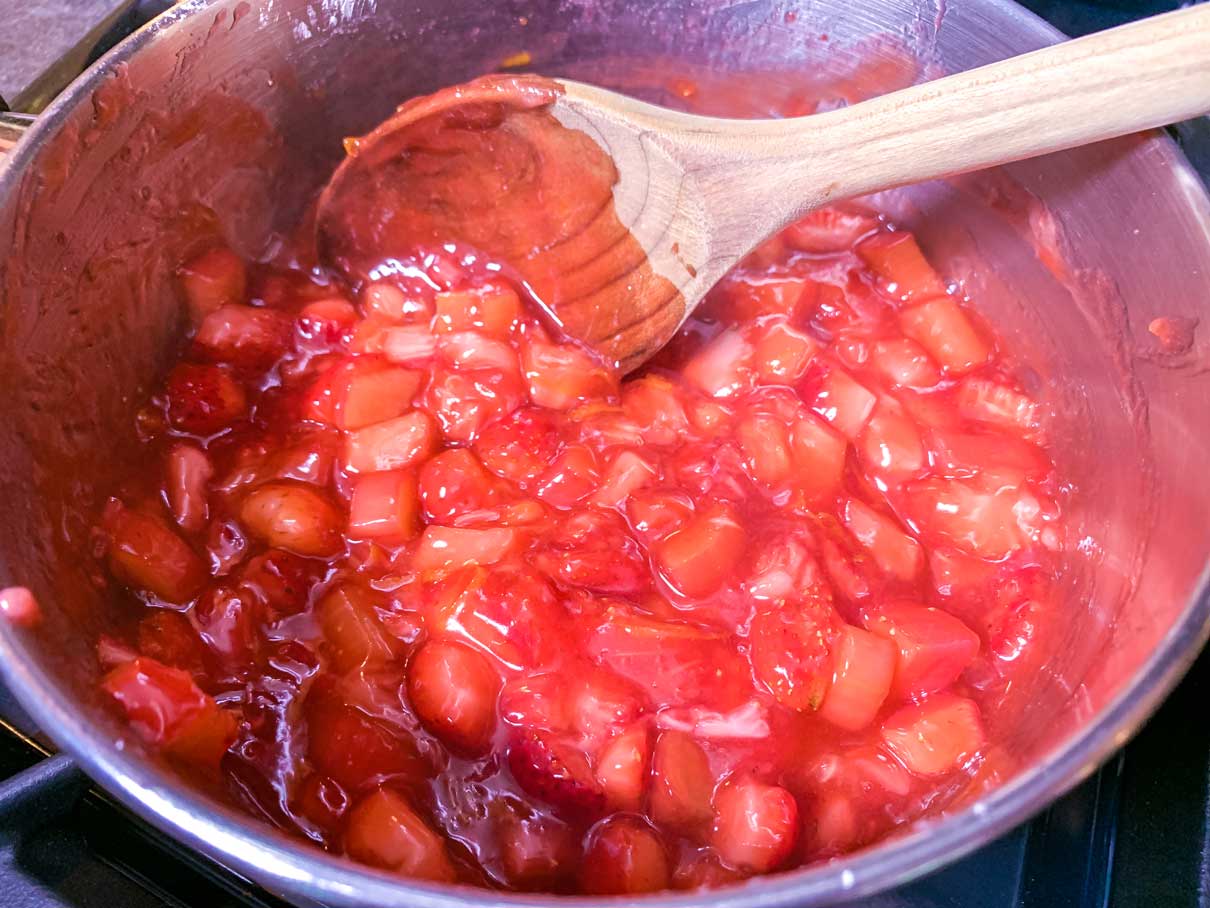
When your mixture is thick and bubbly, remove it from the heat of the stove and set it aside while you prepare your dough.
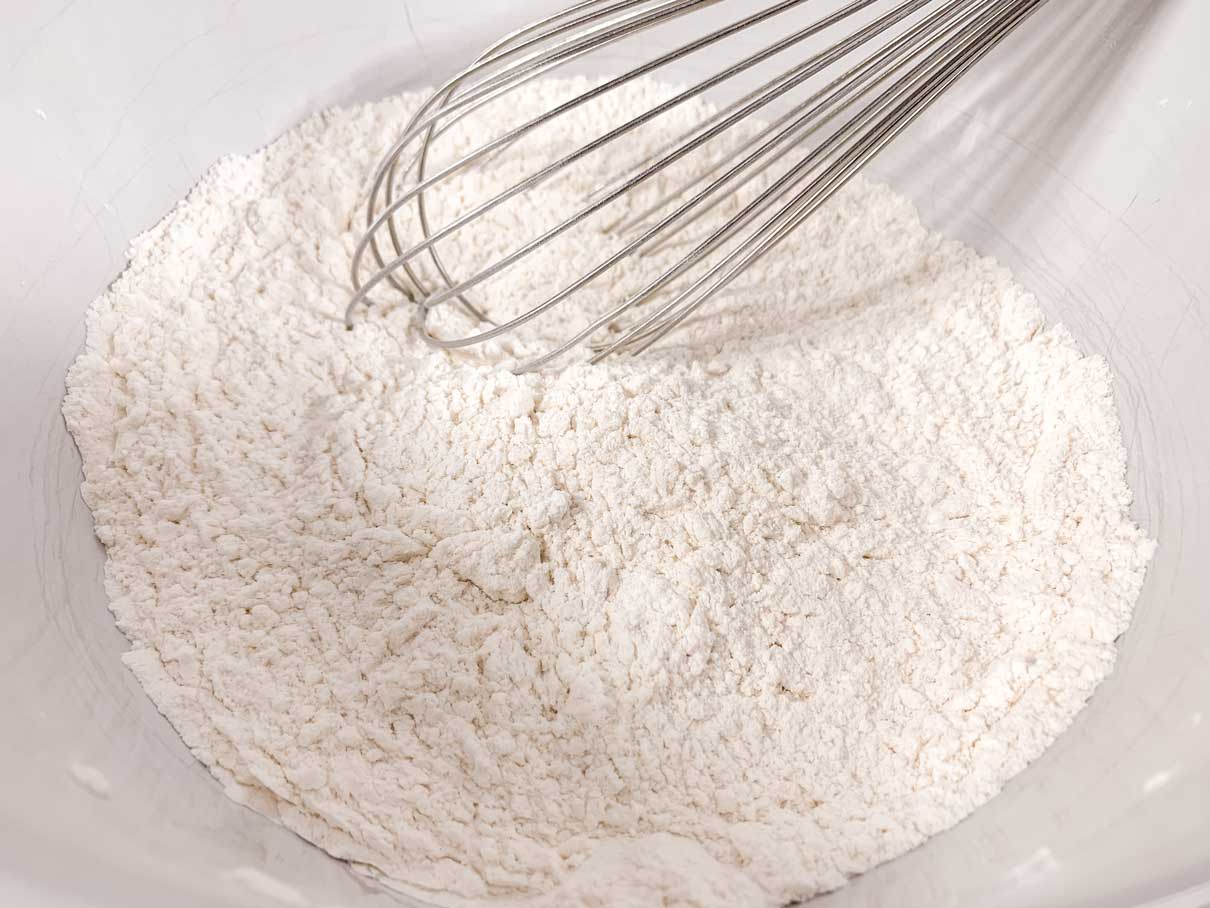
Whisk your flour, sugar and salt together in a large bowl.
Chop some very cold butter into cubes, and add it to the flour mixture.
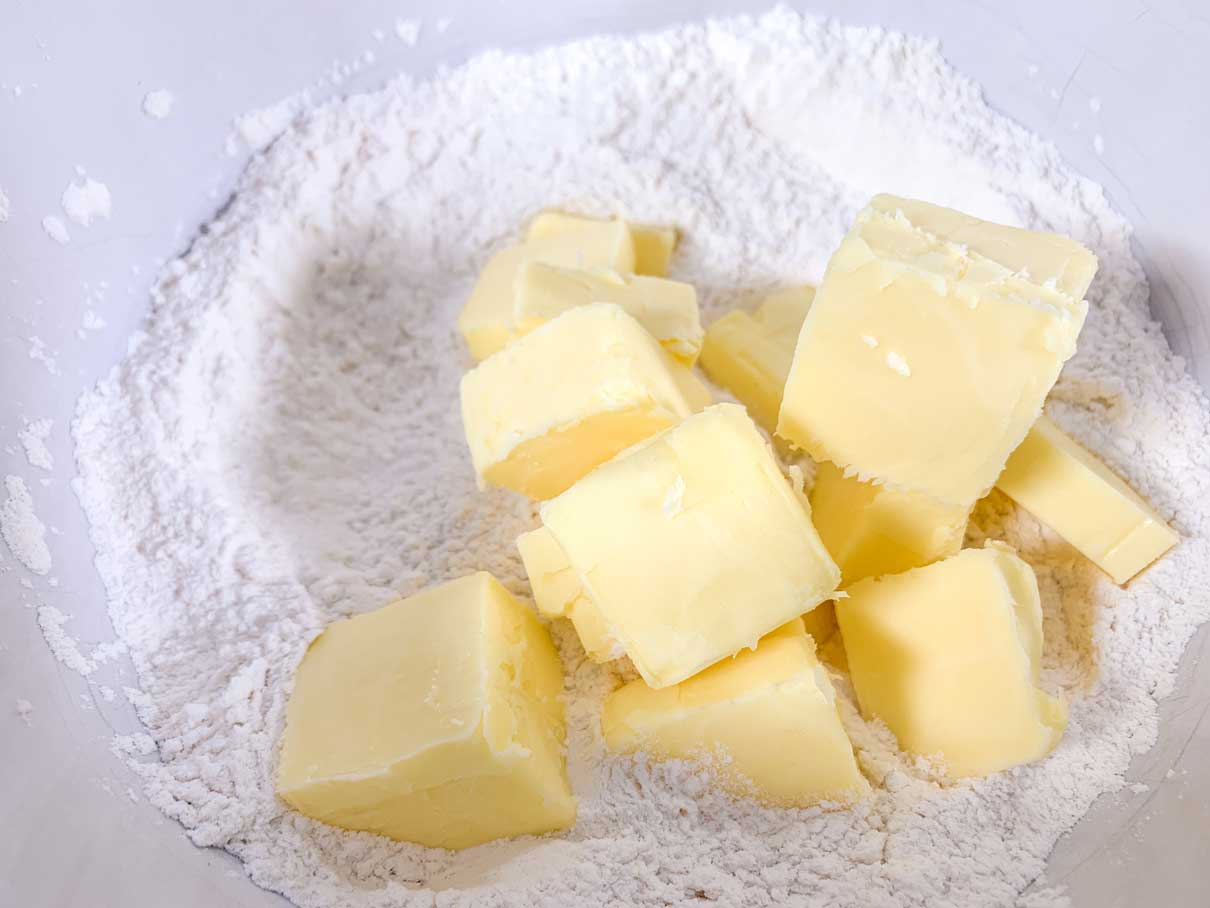
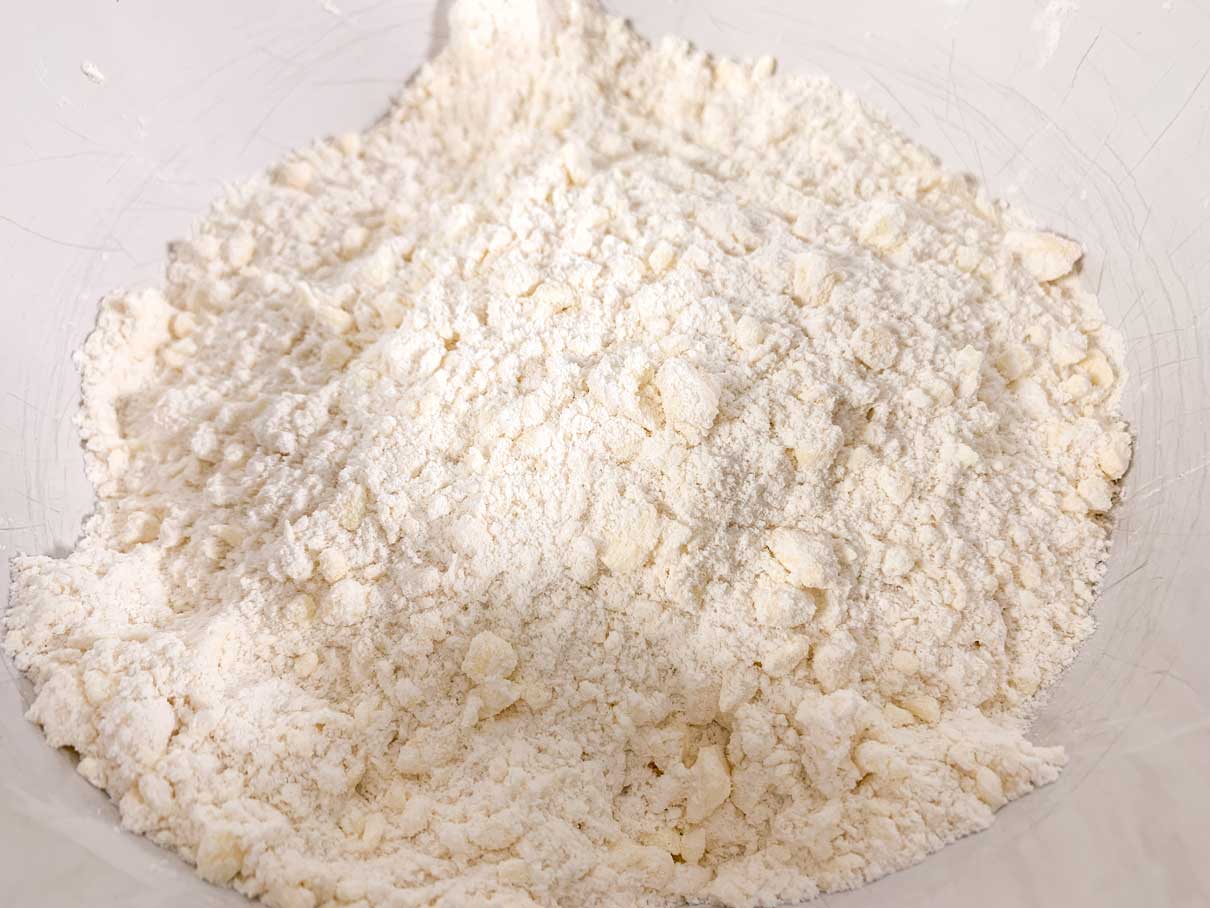
Use a pastry cutter to cut the butter into the flour until the mixture resembles coarse crumbs.
Add a couple of whisked eggs and 2 tablespoons of milk to the flour mixture and mix thoroughly. You want the dough to be just moist enough that you can gather it together in a ball. If it’s still very dry and crumbly, you can add a little more milk. Both times I made this recipe, I started with 2 tablespoons of milk, but found I needed to add 3 tablespoons total.
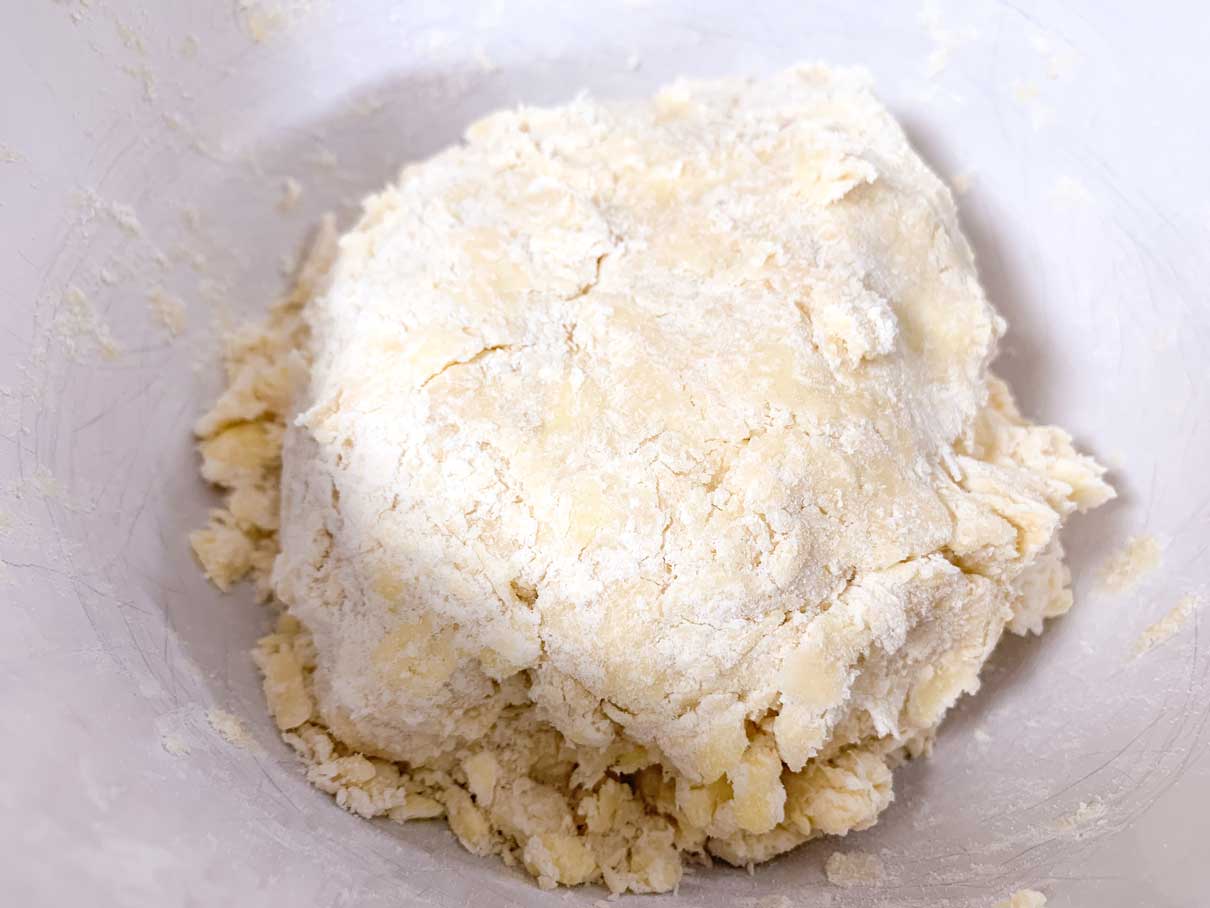
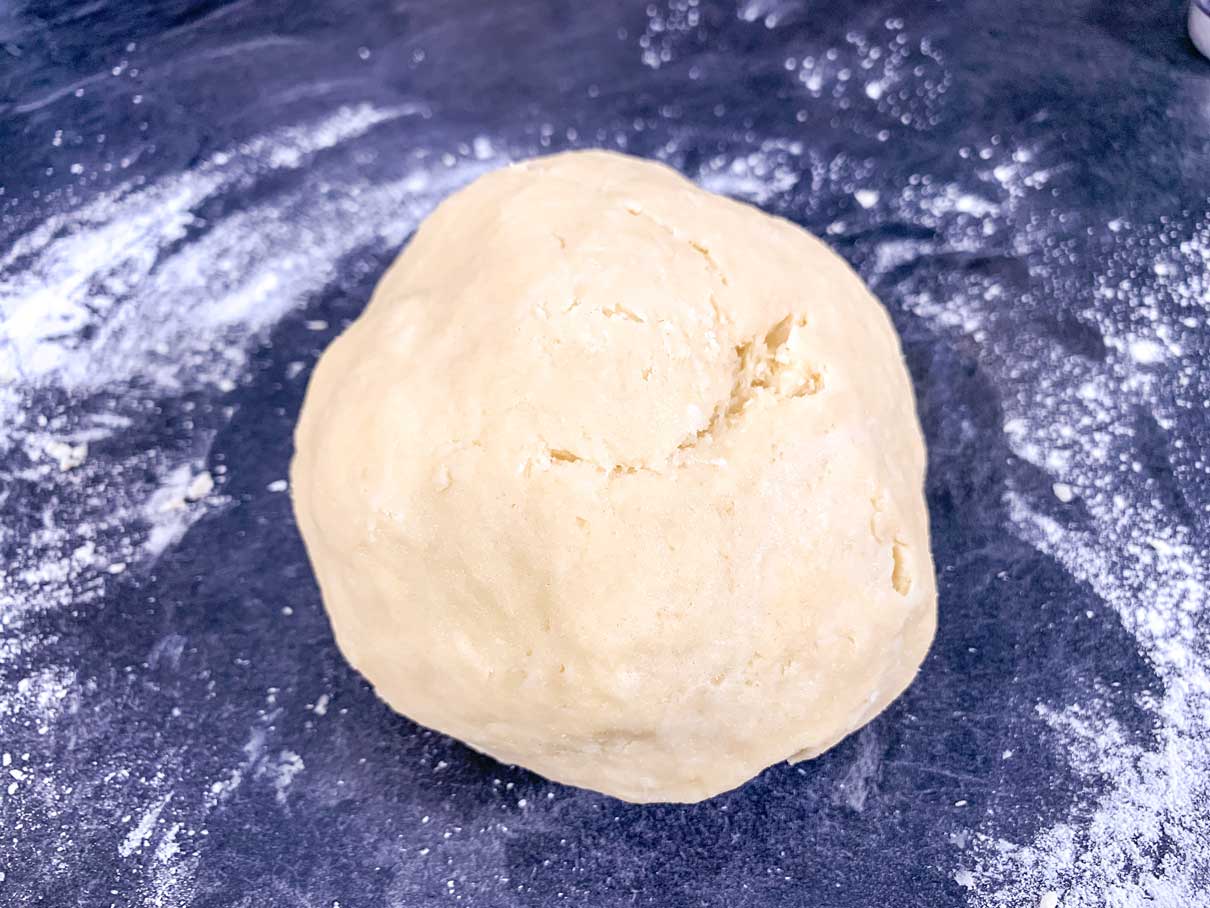
Once you’re able to pinch the dough together in a rough ball, turn it onto a lightly floured surface. Gently knead it a few times to incorporate any last stray crumbly bits of flour.
Now here is where the dough handling gets interesting. As I mentioned previously, I tried making these pies two separate times. Here’s what I did differently on each attempt.
Attempt # 1
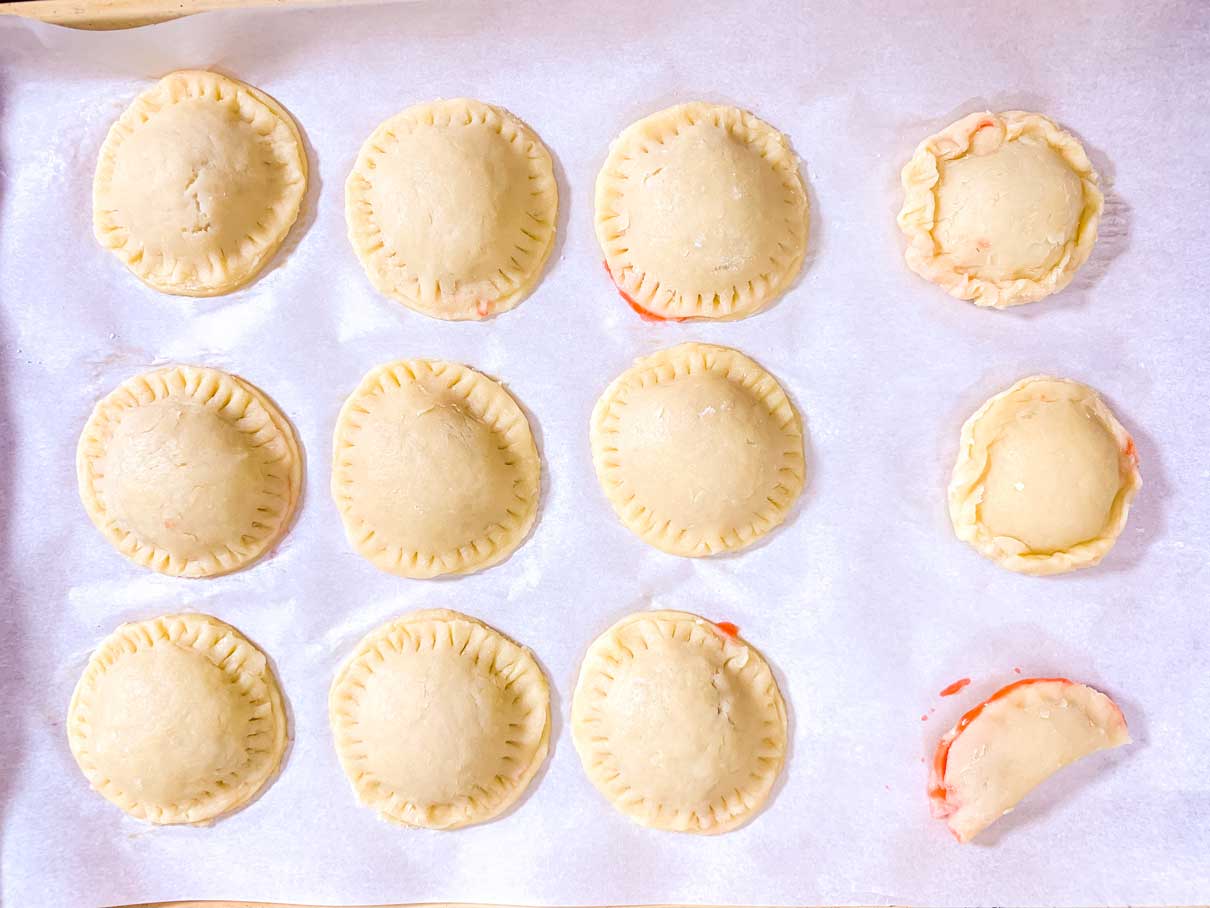
The original recipe says to divide the dough into 4 balls, wrap each piece in plastic wrap, then chill for 30 minutes before rolling it out. I always find it super annoying to roll out dough when it’s chilled, so instead of chilling the dough in a ball, I rolled the dough flat and cut out my round dough circles first (using a 3 inch round cookie cutter). I then chilled the pre-cut dough circles in the fridge until they were firm.
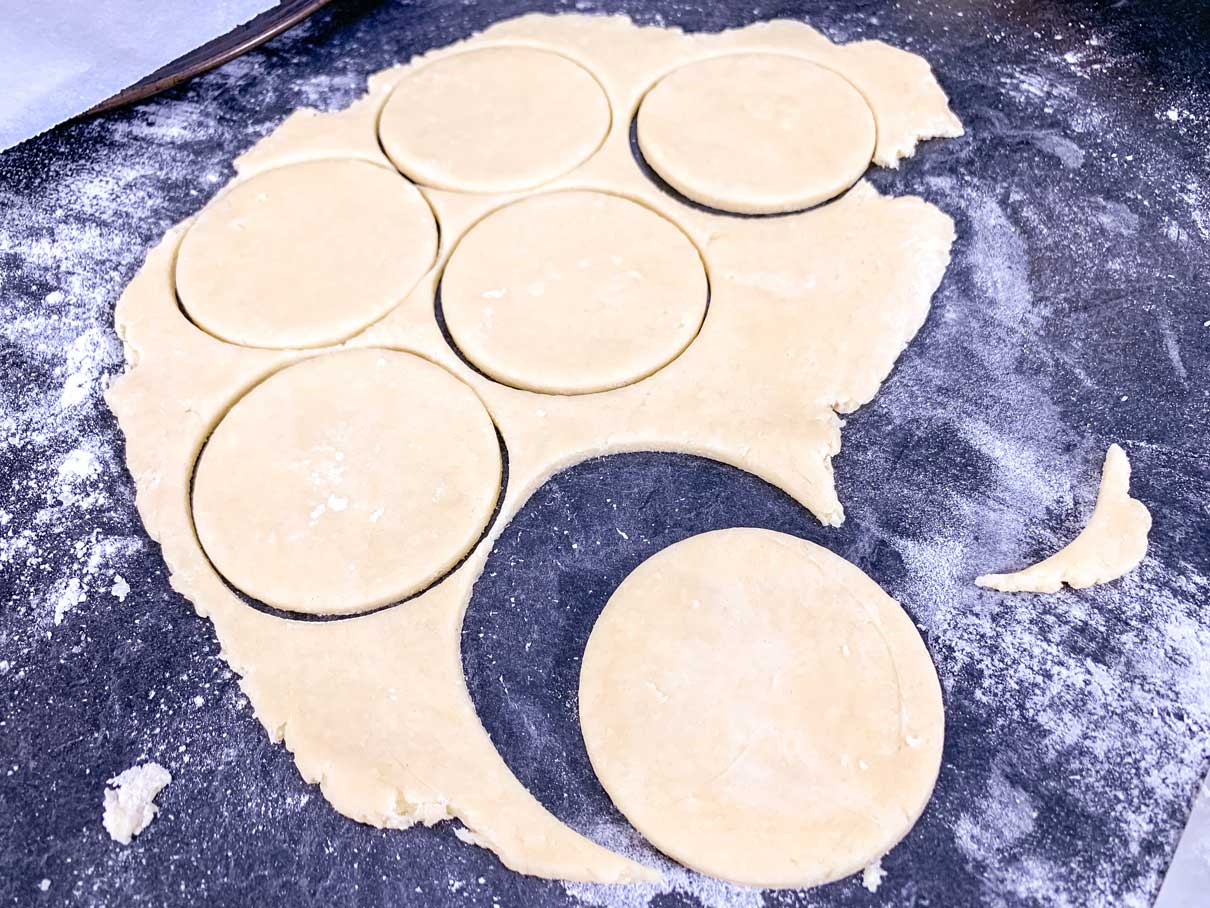
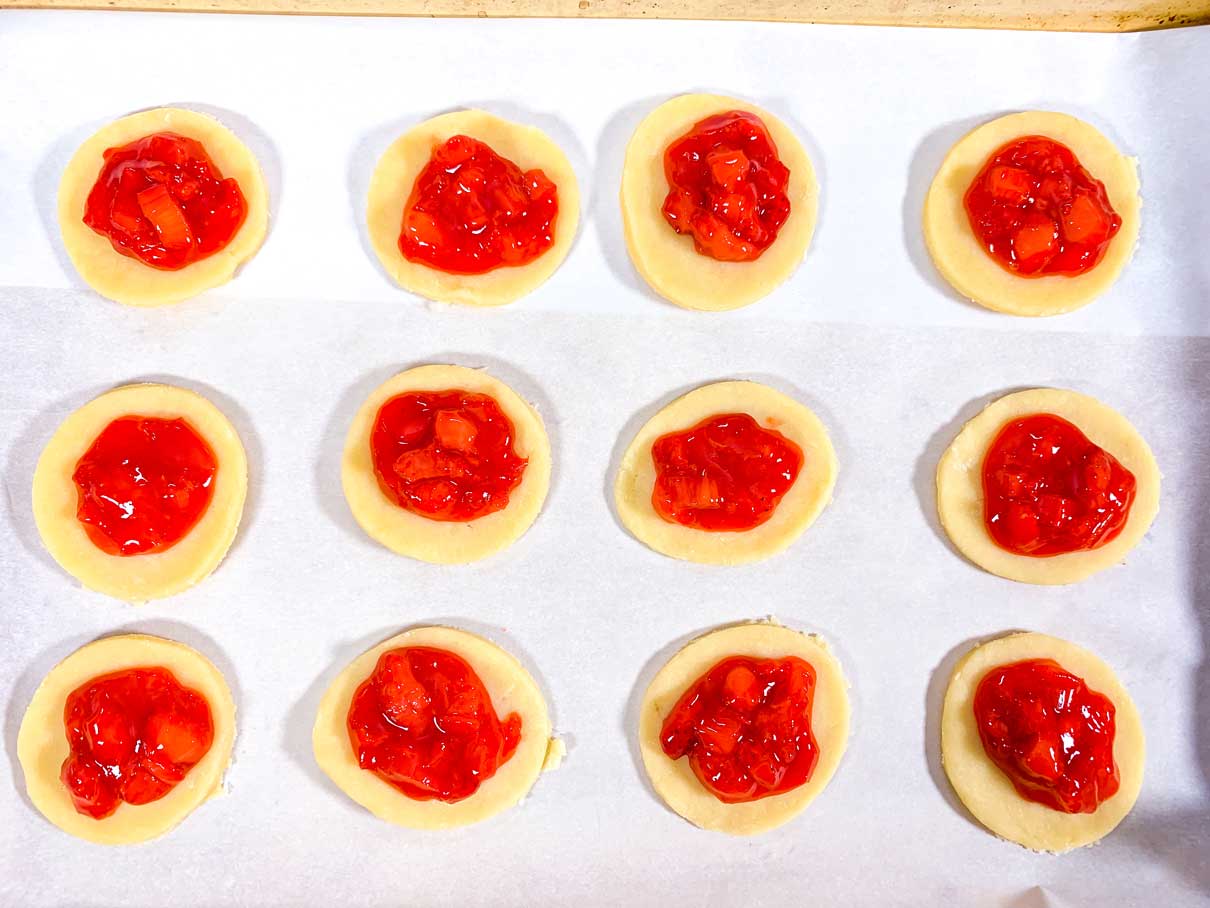
When the circles had chilled, a placed them on a cookie tray lined with parchment paper. I then piled a small teaspoon of filling onto the centre of each dough circle.
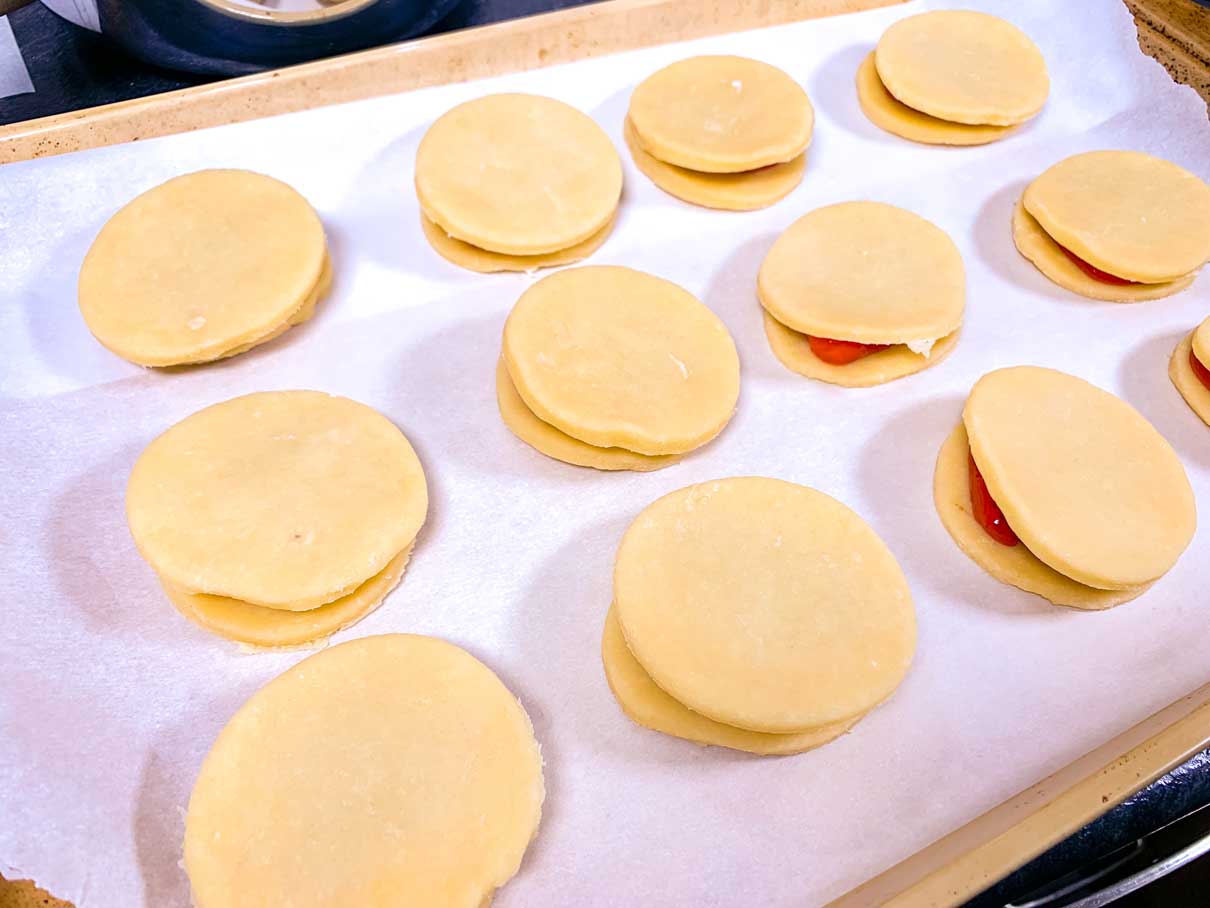
Next, I gently placed a second dough circle on top of the filling to make the top crust.
At this point, the recipe says to press the edges of the pie crusts down with a fork to get them to stick together. When I tried this, all my pie filling began to ooze out the sides, and I was left with a big sloppy mess.
I decided to take the dough tops off and use the back of a spoon to stretch and shape the top dough circle into a slight dome shape. I figured this would create a little cavern for the filing to settle into.
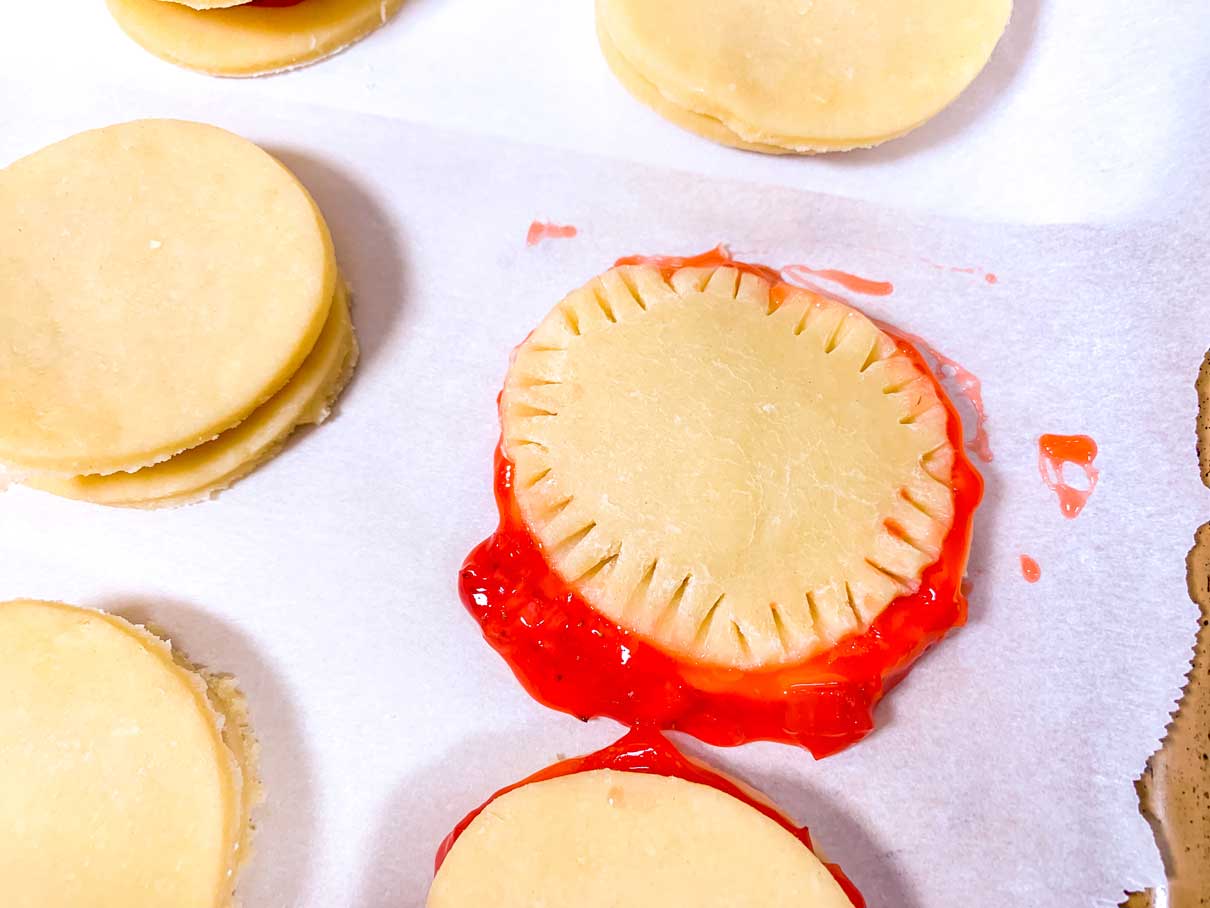
I placed the newly shaped dough domes on top of the bottom pie circles again, and crimped the edges with a fork. I still had a little bit of filling ooze out, but not nearly as much.
I gave each little pie a light brush with an egg wash and sprinkled them with sugar. I used a sharp knife to cut a little ‘x’ into the top of each pie crust. However, by this time the dough was getting a little soft, so the cuts were a little sloppy looking.
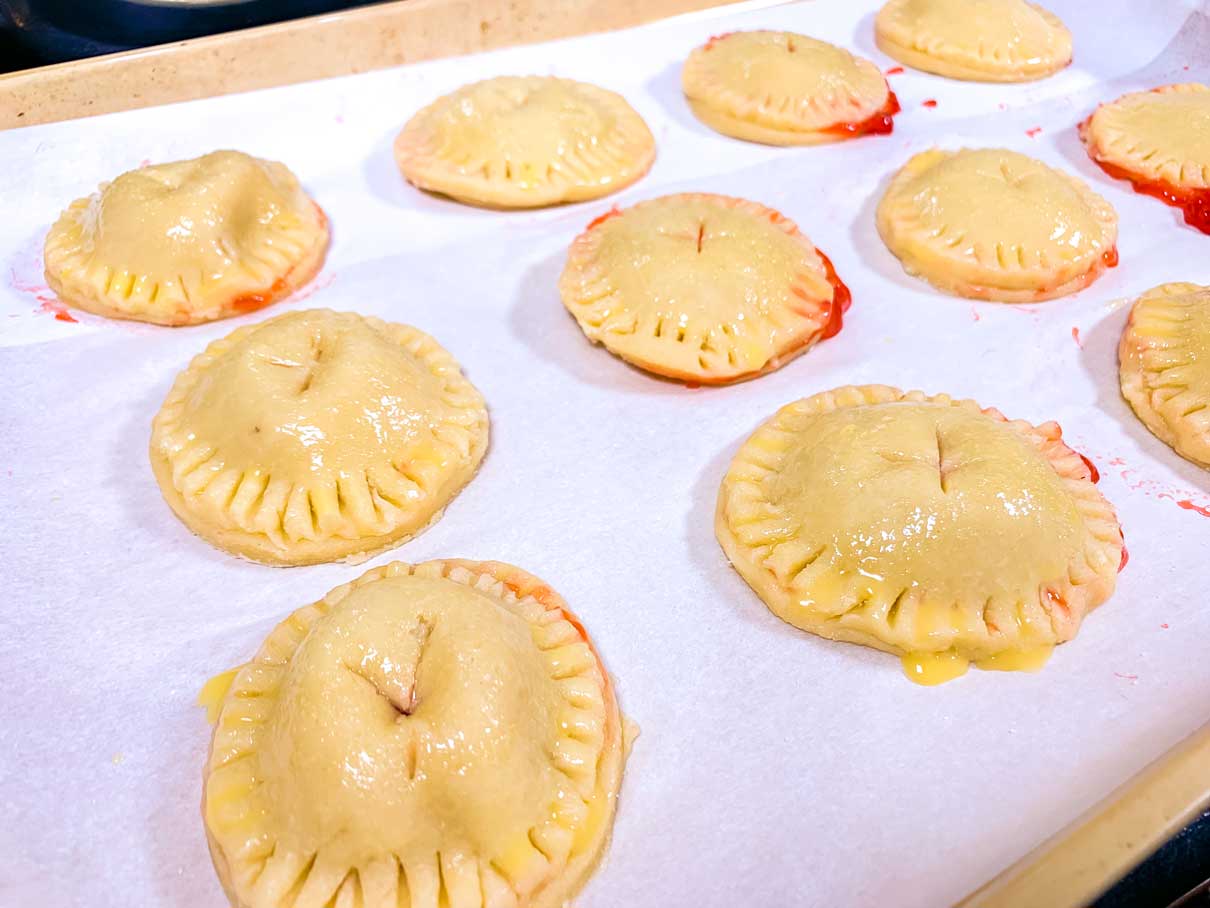
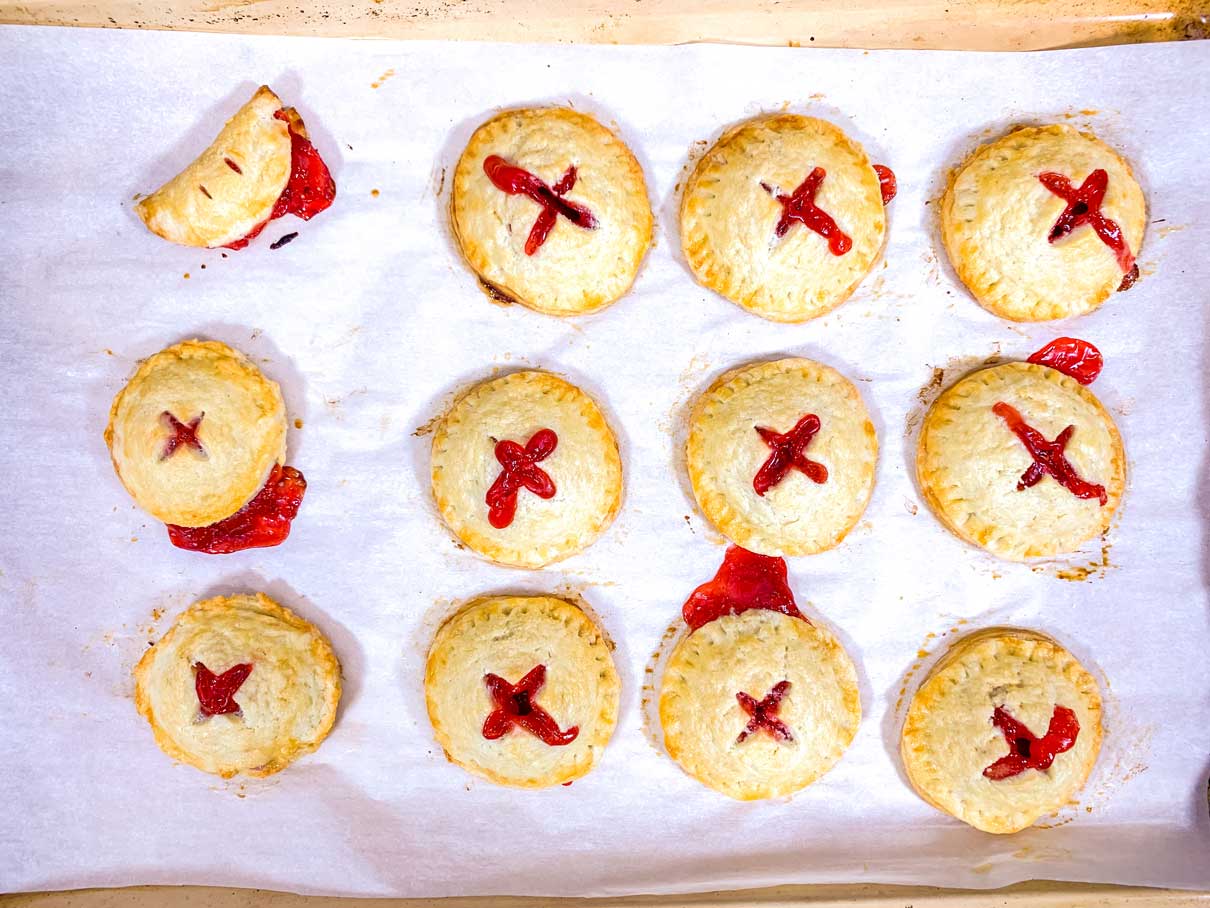
I threw the pies in the oven, and baked them for about 25 minutes until the crusts were golden brown.

Most of the pies had filling ooze out the sides. I considered this a pretty big loss, since there isn’t a lot of filling in them to begin with. I also found that I had rolled the dough a bit too thick. It does puff up quite a bit when baked, so the end result had a less than desirable pastry to filling ratio.
Attempt # 2
On my second attempt, I rolled the dough a bit thinner. I cut out my circles, the same as I did the first time, but I didn’t put them in the fridge to chill right away. Instead, I proceeded with the assembly process.
I put the dough circles on a parchment lined tray, brushed the perimeter edges lightly with some egg wash, and then put a spoonful of filling on top.

I used the back of a spoon to shape the top crust in a slight dome shape, same as I did previously, before placing it on top. I then crimped the edges with a fork. By doming the top crust, I ended up with much less filling trying to escape while crimping the edges.
Since the dough was not yet chilled, it was more pliable and the edges seemed to stick together more easily. I think the thin layer of egg wash also helped the edges stick together better.
I also tried making a sort of pierogi shaped pie, but that one did leak a little when I tried to seal it. I think I would need larger dough circles if making a whole batch shaped this way.
After the pies were all assembled, I put the whole tray in the fridge to chill for about half an hour. Then I used a sharp knife to cut a little ‘x’ into the top of each pie crust. The ‘x’s were much easier to cut when the dough was chilled like this.
Each little pie got a light egg wash, followed by a sprinkling of sugar, and then they went in the oven for about 25 minutes until the crusts were golden brown.

This time I had much less filling ooze out of the sides of the pies, but I did have some bubble out of the top. The little ‘x’ shapes were much more prominent in this batch. Honestly, they kind of reminded me of a bunch of little Ovomorphs (Xenomorph eggs). I think i domed the tops a bit too much on these, since there were some fairly large, empty air pockets in the centre of them.
I would definitely like to make these again. Regardless of whether you can get them looking like perfect little pies, the flavour is still amazing, especially when they are still warm and fresh from the oven!
I did find the dough easier to handle/shape/seal when I assembled them first, then chilled them whole. I didn’t notice a significant difference in the end pastry texture in either case. I believe the egg wash did help with sealing the edges more.
If you try this out, I would love to hear how you found the pastry assembly process. I think it is a little finicky, and I’m sure there is a knack to getting perfect pies each time, but I haven’t quite figured out what that is yet!


Strawberry Rhubarb Hand Pies
Ingredients
For the Dough
- 3 cups all purpose flour
- 2 tbsp sugar
- 1/4 tsp salt
- 1 cup unsalted butter (cold, cut into cubes)
- 2 eggs (whisked)
- 2-3 tbsp milk
For the Filling
- 1 1/3 cups fresh strawberries (hulled and chopped)
- 1 cup rhubarb (diced)
- 2 tbsp cornstarch
- 1/2 cup granulated sugar
- 1 tsp orange zest
- pinch of salt
For the Egg Wash
- 1 egg, whisked with 1 tsp of water
- extra sugar for sprinkling
Instructions
For the Dough
- In a large bowl, whisk together flour, sugar and salt.
- Add the cold butter. Use a pastry blender to cut the butter into the flour, until the mixture resembles coarse crumbs.
- Add the whisked eggs and 2 tbsp of milk. Mix thoroughly. The dough should be just moist enough that you can gather it together in a ball. If it’s still very dry and crumbly, you can add another tbsp of milk until you can form it into a ball.
- Turn the dough onto a lightly floured surface. Gently knead it a few times to incorporate any last stray crumbly bits of flour. If your dough is very sticky, sprinkle it with a little more flour while kneading.
- Divide the dough into 4 equal pieces. Shape into discs, wrap in plastic wrap and chill for 30 minutes.
For the Filling
- In a medium saucepan, add the strawberries, rhubarb, cornstarch, sugar, orange zest and salt. Cook over medium heat, stirring constantly, until the mixture is thick and bubbly (about 6-8 minutes). Set aside to cool slightly.
Assemble the Pies
- Pre-heat your oven to 350°F.
- Take one ball of dough, and roll it out on a lightly floured surface to about 1/8 inch thick.
- Cut circles out of the dough using a 3 inch round cookie cutter. Re-roll any scraps and cut out additional circles until the dough is all used up. Repeat with the other balls of dough.
- Place the dough circles on a parchment lined baking tray. Brush the edges lightly with the egg wash.
- Drop a heaping teaspoon full of pie filing onto the centre of each dough circle.
- Place a second dough circle on top of the filling. Use a fork to press down and seal the edges of the pie crust.
- Brush the tops of each pie with the egg wash, and generously sprinkle with some granulated sugar.
- Cut a small slit into the top of each pie crust to allow the steam to vent.
- Bake pies at 350°F for 25-30 minutes, until the crust is golden brown. Allow pies to cool slightly before serving.
Your ingredient list is missing the eggs in the dough. I assume 2 eggs as your text mentions “a couple of eggs”.
Thank you for catching that! You’re correct – it should be 2 eggs. I have updated the recipe!