
If there’s one thing Collin knows how to make, it’s quiche. I mean, he can make other things as well, but this is one of his specialities. However, his quiche making method hasn’t been particularly well documented, so I took it upon myself to try and capture the recipe to share here.
The original quiche recipe that we have written down in a cookbook is from Collin’s mum. Collin decided to make some modifications to it which he haphazardly scribbled on a separate recipe card. To be clear, he wrote down only the modifications on the other card, not the entire recipe, so whenever I’ve tried to make this, I’ve had to keep looking back and forth between the two, so I can follow the method on one, and the ingredients on the other.
The other thing that is worth noting, is that the modifications are also just a guideline, and not very helpful for a first time reader. “A generous handful of this…a bunch of that…a package of the other…”
I attempted to measure out the quantities that he usually puts in, but then we ended up in a rather heated discussion about the “right way” to make quiche.
The method that I have described below is my variation. We both have some choice words about how each of us prepares this quiche, and according to Collin, this is the wrong way. Please note the differences outlined below.
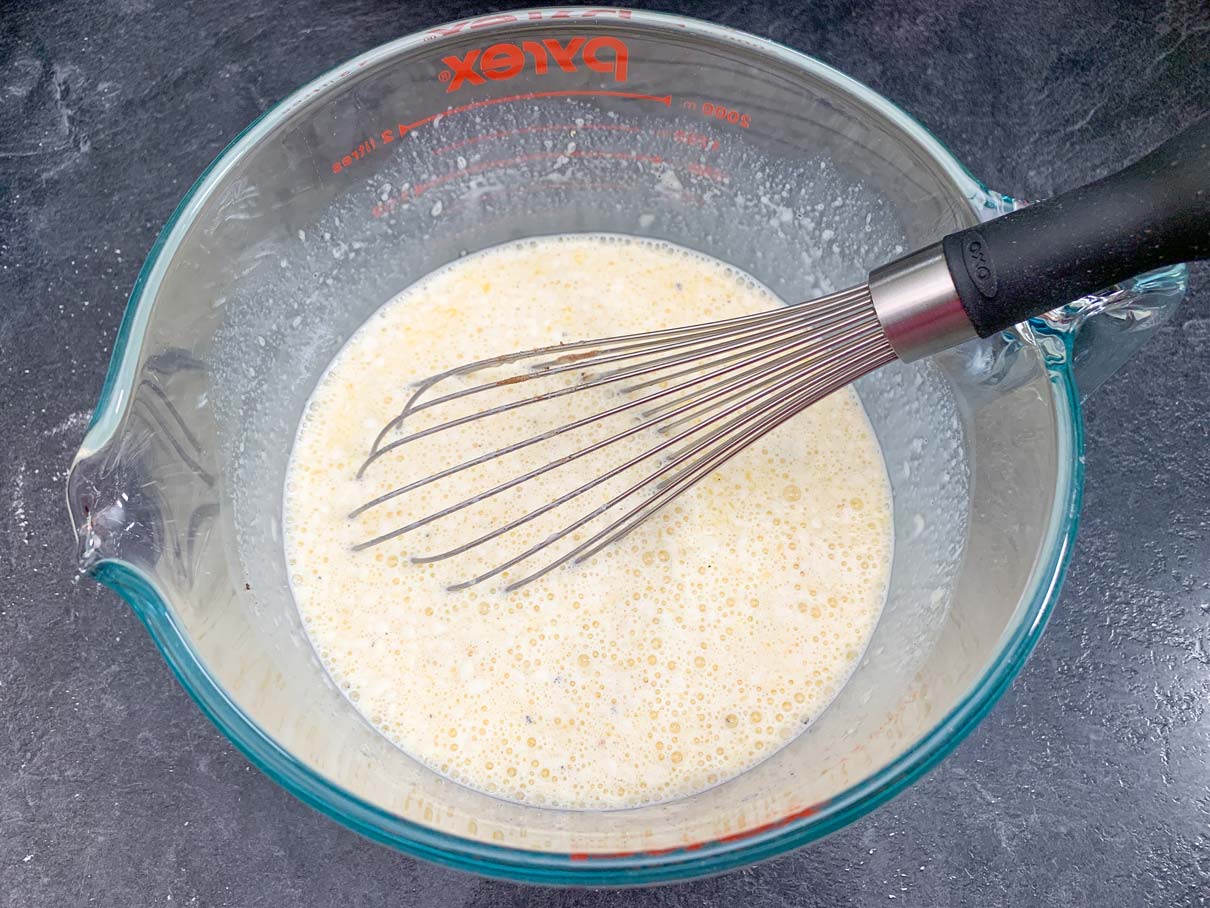
Start by whisking together eggs, half and half cream, melted butter, flour, nutmeg, and some black pepper. (Note 1: I use butter. Collin uses margarine. The recipe also calls for salt, but we both omit that as the ham & bacon adds enough salt on its own.)
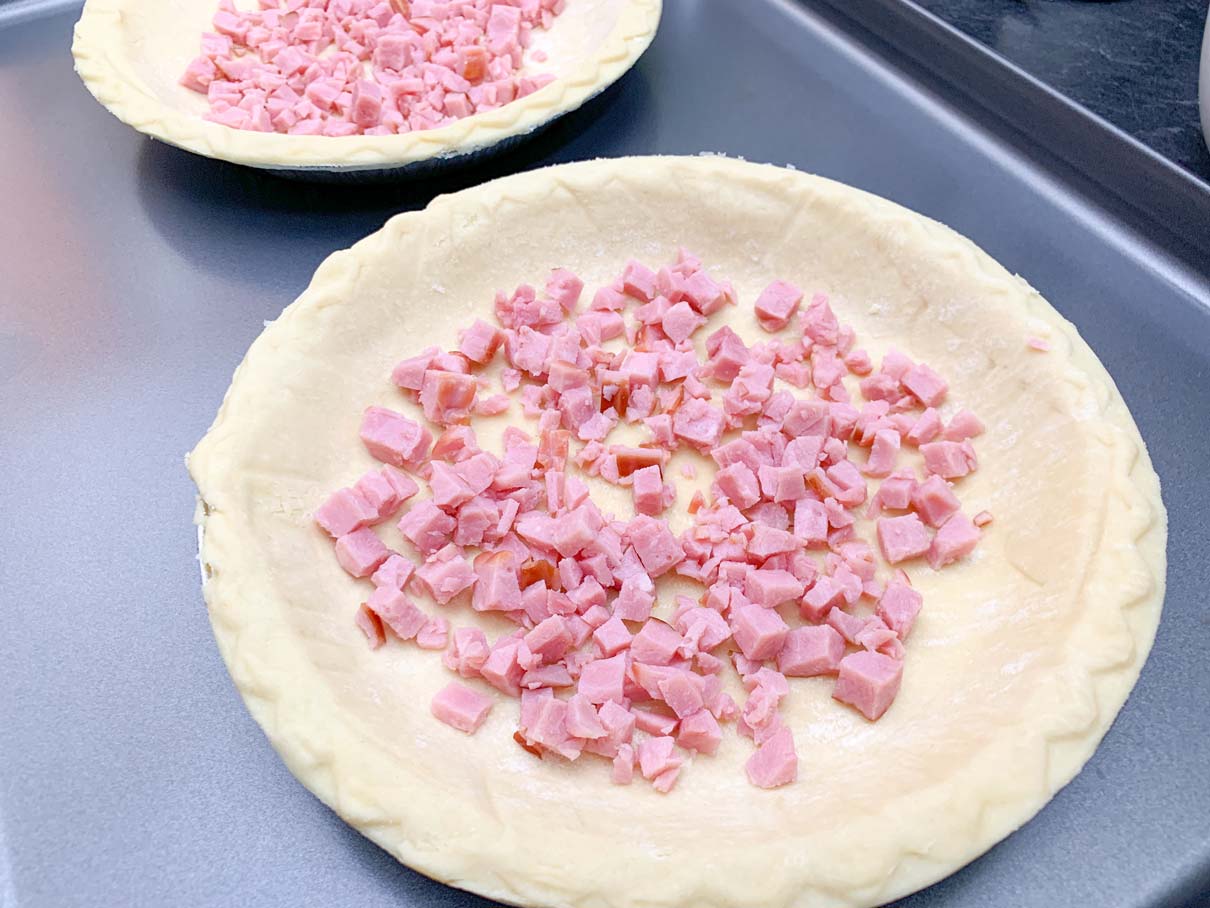
Next, grab two deep dish Tenderflake pie shells. You could make your own crust if you so desire, but this is not supposed to be a complicated quiche, so convenience wins out here. (Note 2: I keep the pie shells in the aluminum pie plates that they come in. Collin transfers the pie shells to a different pie plate. More on that in a moment.)
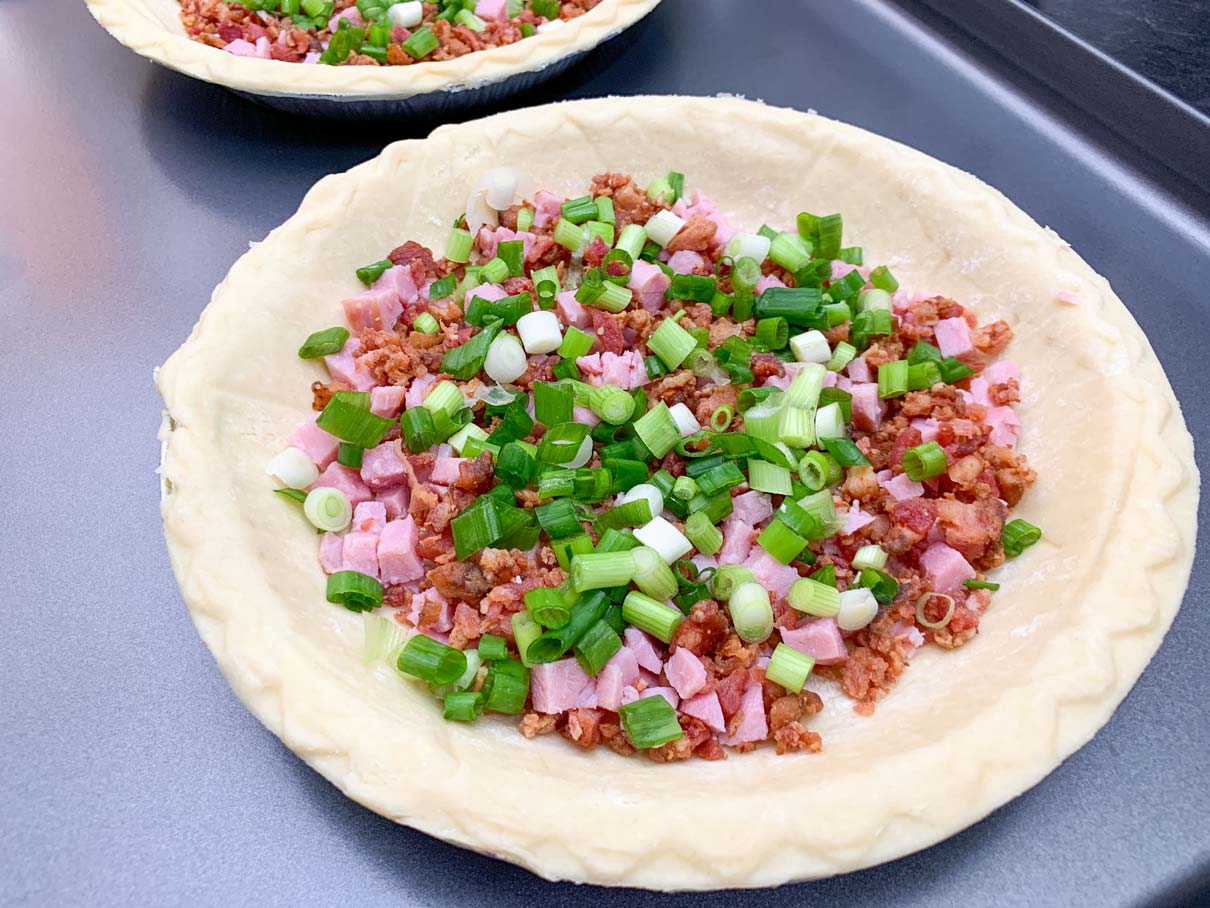
Take some diced ham and divide it evenly across the two pie plates. Sometimes we use thin sliced deli ham that we chop into small pieces. Other times if we have a whole ham, we just chop it up small. (Note 3: Collin advocates for the deli ham version, whereas I could go either way. For this we used whole ham, which I apparently did not chop up small enough.)
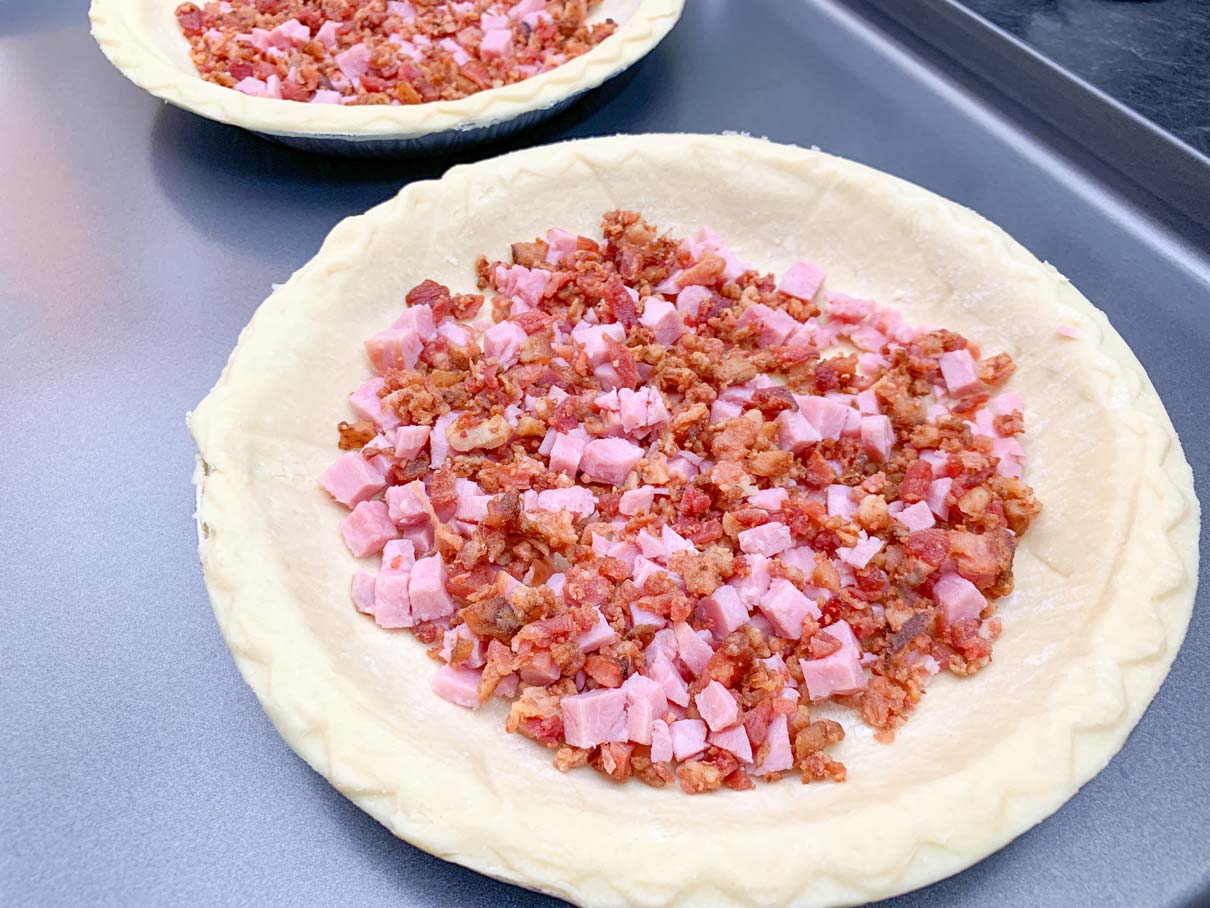
Now take some crumbled bacon and divide that across the two pie plates as well. You can either use fresh cooked bacon, or pre-cooked bacon bits. (Note 4: I always prefer fresh cooked bacon. Collin enjoys the convenience of bacon bits in a bag.)
Sprinkle a generous handle of chopped up green onions over top of the bacon and ham.
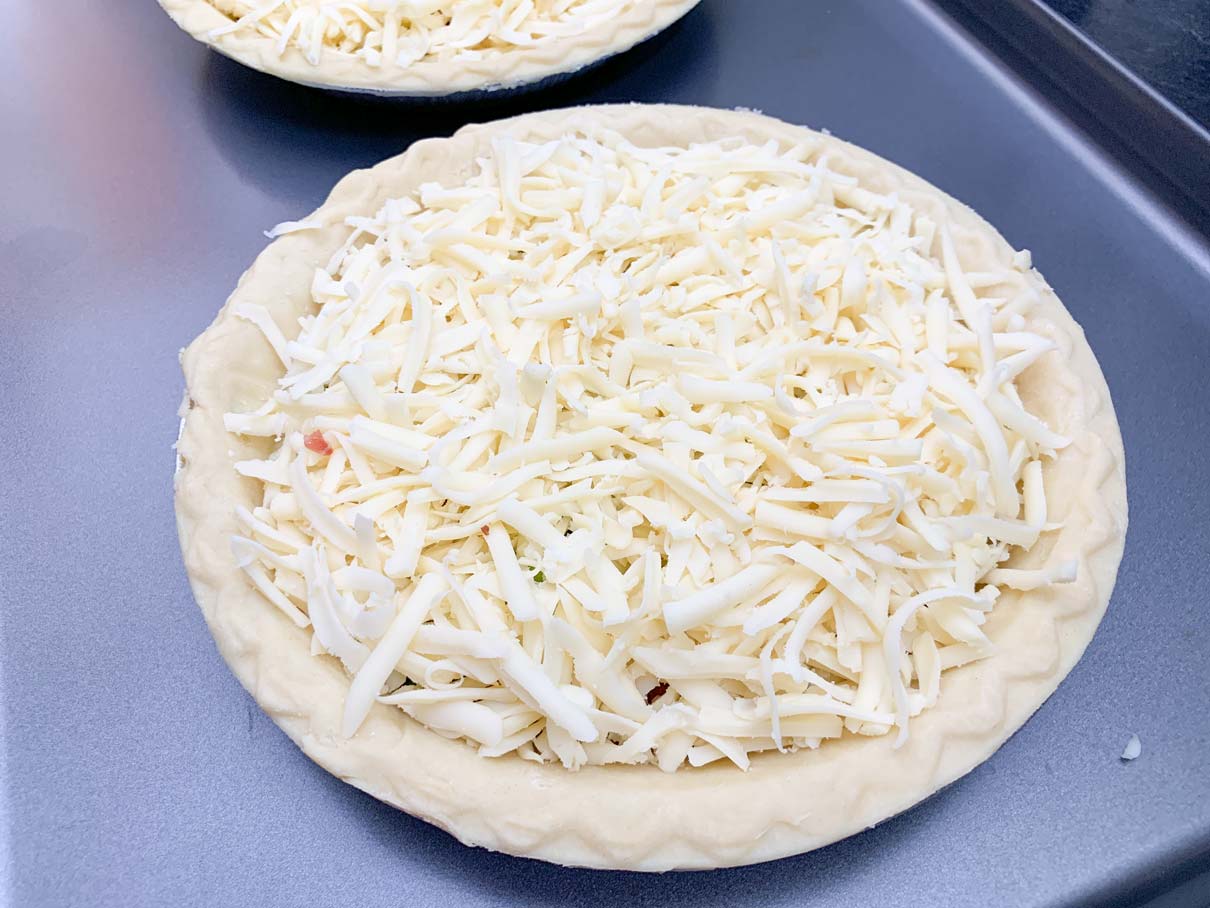
Heap a generous handful of grated Swiss cheese into each of the pie plates. (Note 5: I used less cheese than Collin normally does. This is a crime. A major crime. To be honest, this quiche is really about 95% meat and cheese, with just enough egg to fill in the cracks, so reducing the cheese volume is clearly worse than murder.)
Now fill in the cracks with your egg mixture. I made sure there was just enough filling that it came to the top of the dish. (Note 6: As I mentioned before, Collin transfers the pie shells to a larger pie dish before filling them. This is so that he can put in way more filling than actually fits in the shells, and there will be room for it to spill out, and form a layer of quiche around the exterior of the pie crust.)
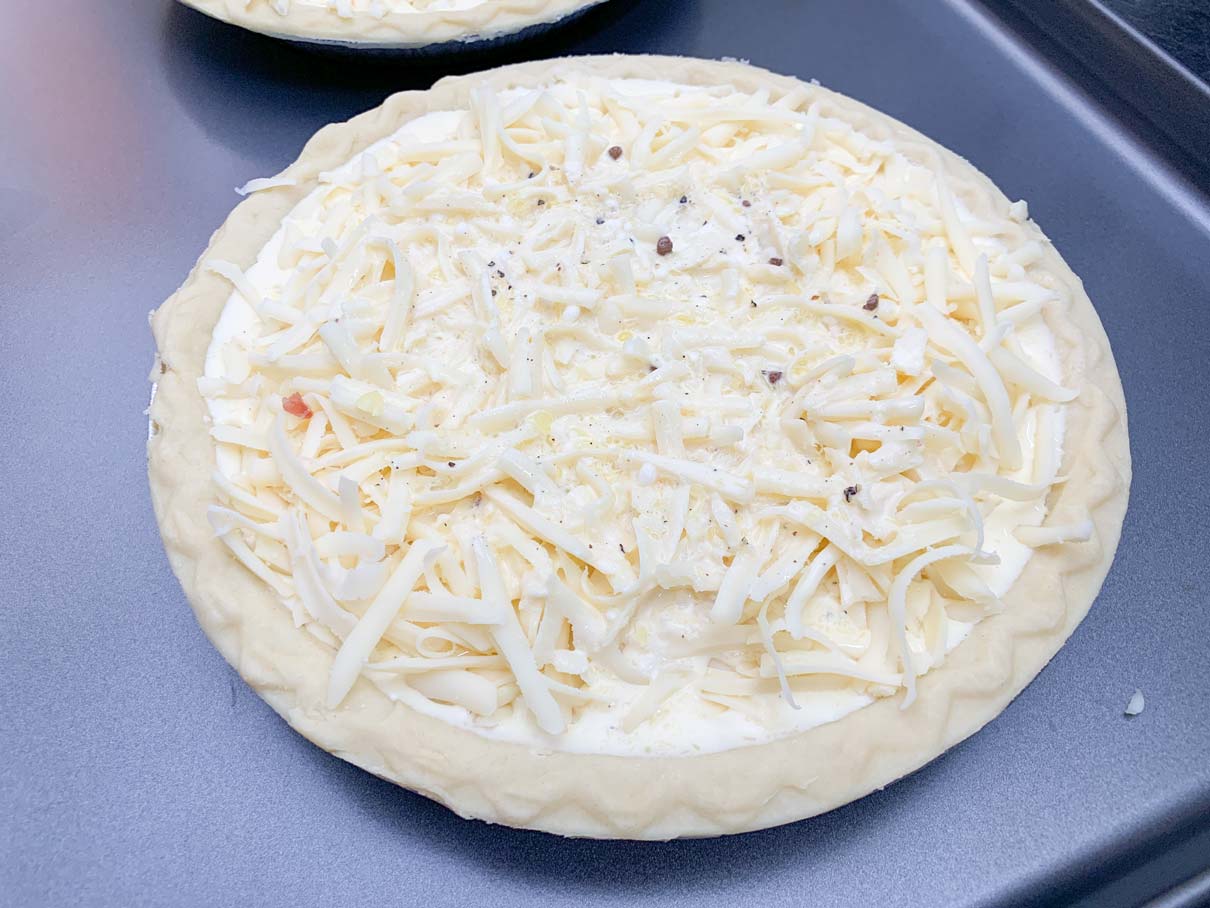
Sprinkle a few more chopped green onions over the top before baking. This adds a little colour and just makes the quiches look nice on top after they are baked. (Finally, something we both agree on!)

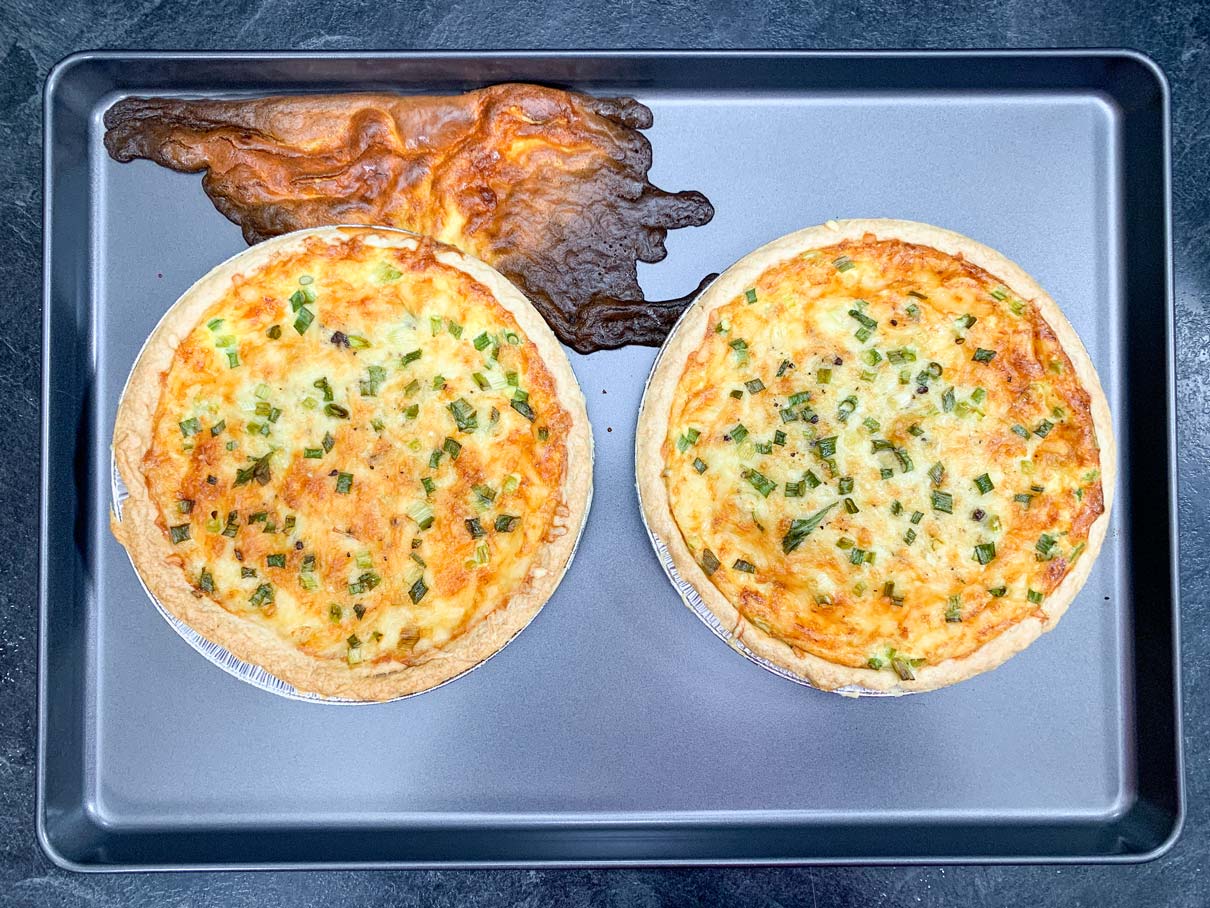
Bake the quiches for about 40 minutes, or until the egg has set and the top is golden brown. Since I baked these quiches in the aluminum pie plates that the pie shells came in, I placed them on a baking tray just in case they dripped. Unfortunately, my baking pan warped with the heat of the oven, causing one of the quiches to tip and some of the filling spilled out. As Collin conveniently pointed out, this wouldn’t have happened had a transferred them to the other heavier pie plates…(insert death stare here).
Let the quiches cool for 20-30 minutes before serving. They will be easier to cut once the cheese has firmed up a bit.

Now you can decide whether you want to make quiche the way that Collin makes it, or the way that I make it. Although I’m quite sure that from now on I’m going to leave all the quiche making up to him so we can avoid having this “how-to-make-quiche” debate all over again.
Don’t tell him I said it, but I do actually think his quiche turns out better…shhhhhh!

Collin's Quiche
Ingredients
For the egg mixture
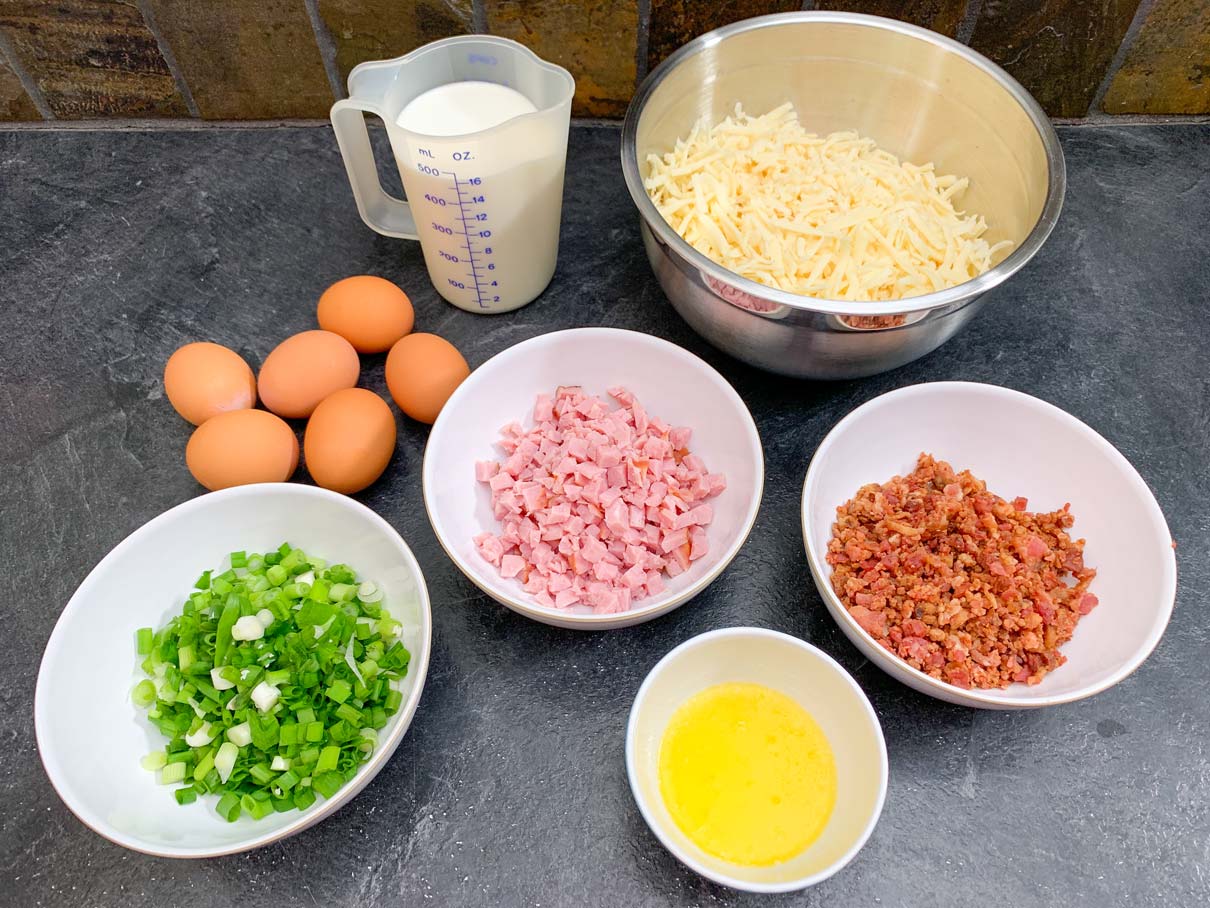
- 2 x 9 inch deep dish pie shells (we use Tenderflake)
- 6 eggs
- 2 cups half & half cream
- 3 tbsp melted butter or margarine
- 2 tbsp all purpose flour
- 1/4 tsp nutmeg
- salt and pepper to taste
For the rest of the filling
- 1 cup chopped ham
- 1 cup chopped bacon
- 1 cup chopped green onions (about 8)
- 4 cups grated swiss cheese (about 400g)
Instructions
- Whisk together eggs, half & half, melted butter, flour, nutmeg, salt and pepper.
- Evenly divide the ham, bacon and most of the green onions across the two pie shells. (Reserve a small amount of green onion to sprinkle on top at the end).
- Divide the grated cheese evenly between the two pie shells.
- Pour half of the egg mixture over the cheese in one pie plate, then do the same to the other with the remaining egg mixture.
- Sprinkle the remaining green onions on the top of each quiche.
- Bake at 375°F for about 40 minutes, until the egg has set and the top is golden brown.
- Let cool slightly before serving.