There is no other pie quite like this pumpkin pie. It’s a bold statement, but it’s the truth. Sure there are lots of other recipes out there, with a little more of this and a little less of that, but what makes this pie so extremely and uniquely special, is that it’s my dad’s pumpkin pie.
You see, my dad was a baker. He owned his own bakery and was well known by many locals in the neighbourhood who all had their favourite treats that they would stop in for. He sold everything from cookies and cakes, to dinner rolls and hovis loaves, devonshire splits, pastries, donuts…you name it, he made it.
I grew up with the luxury of having fresh baked bread brought home daily, and the joy of being able to sneak behind the counter after school to pilfer chocolate chip cookies from the bakery showcase. The downside however, was that I never had the opportunity to learn any of my dad’s trade secrets. He worked from the early hours of the morning until late at night, six days a week, so we didn’t get to see him much.
After working a lifetime of long, hard, hot days, he was diagnosed with cancer. We sold off the bakery as his health dwindled, and all the recipes he had were left with the business. He passed away eleven years ago. This pumpkin pie recipe is the only recipe I have of his. Out of that huge variety of goodies he used to make, this is the one and only recipe that remains (See? I told you it was special).
I don’t even have his crust recipe for this pie, just the filling. After the bakery was sold, my dad would make these pies at home, but he would use a pre-made tenderflake crust. I usually do the same because it’s fast, easy, and always turns out well. This time however, I decided I would pick a pastry recipe and try making it from scratch. Turns out I really need to keep working on my pie crust skills.
Thankfully it doesn’t matter how terrible your crust is, this filling will make up for any shortcomings. The magical part is that you literally just throw all the ingredients in a bowl and mix it up until well combined.
Dad’s recipe recommends leaving the mix to sit for 2-3 hours in the fridge before pouring it into your pie shells. I’ve read other recipes that suggest it is better for the mix to be at room temperature, but this recipe has never failed me, so why mess with a good thing?
Now for the pie shells…As I mentioned before, normally I would bake the filling in two 9 inch deep dish tenderflake pie shells (you can also use those little mini shells and make individual pumpkin pies). But this time I tried out Martha Stewart’s Pate Brisee recipe.
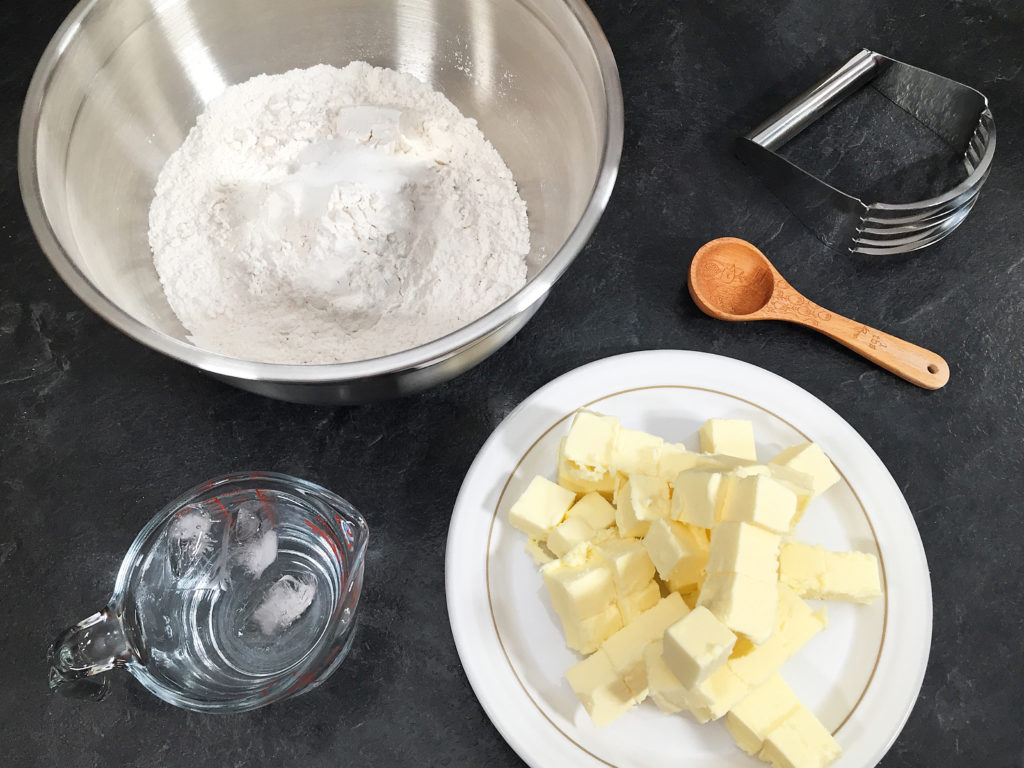
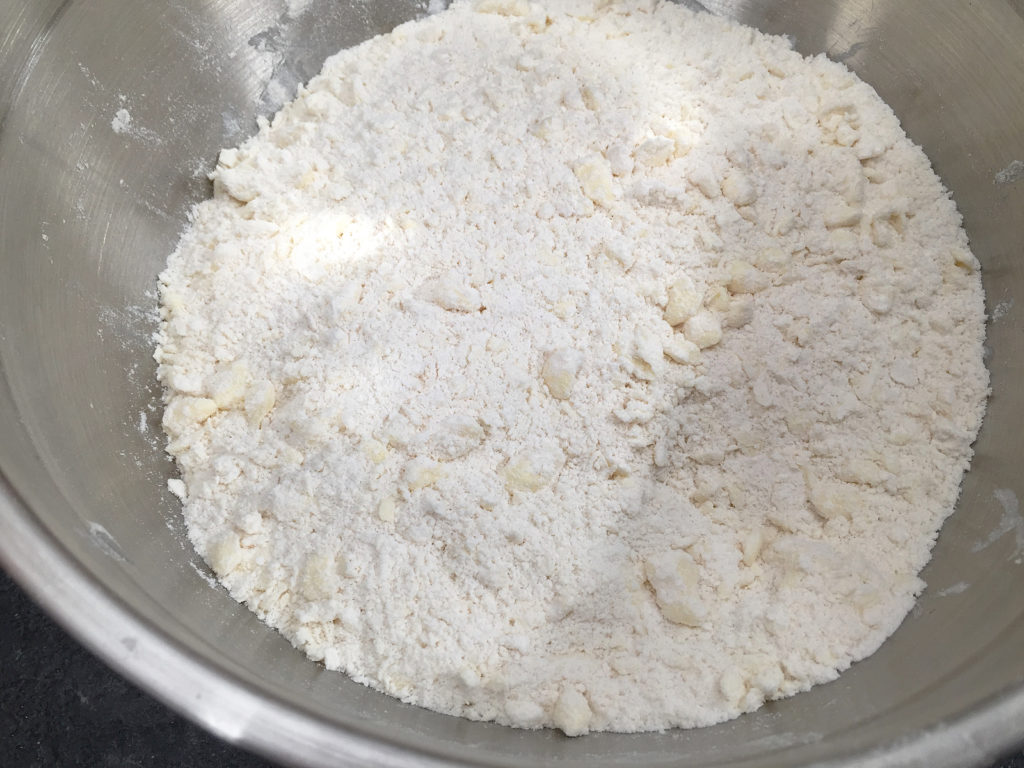
I used a pastry blender to cut the butter into the flour until the mixture resembled coarse crumbs. Then I added some ice cold water, a few table spoons at a time until the dough started to come together.
If you read my Lesson in Pecan Pie a couple of weeks ago, you’ll remember that I discovered my pie dishes are exceptionally deep so I went out and bought two 9″ pyrex pie plates that are much shallower (about 1 1/4″ deep).
Martha’s pastry recipe says it makes enough for one pie crust. I made one and a half times the recipe and there was enough dough for two crusts, plus extra for decorating. I’ve learned not all 9″ pie plates are alike so you really have to pay attention to your pan size to know how much dough you will need.
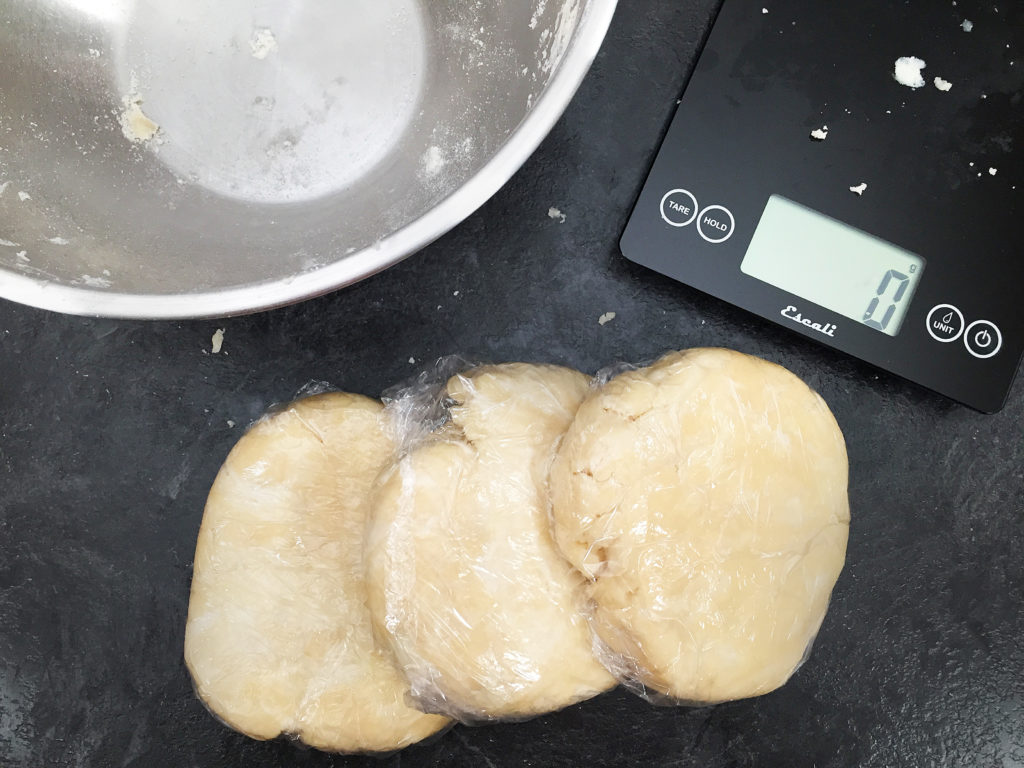
I divided the dough into three equal parts (two for pie crusts and an extra piece for cutting out dough shapes), shaped them into discs and refrigerated them for an hour before rolling them out.

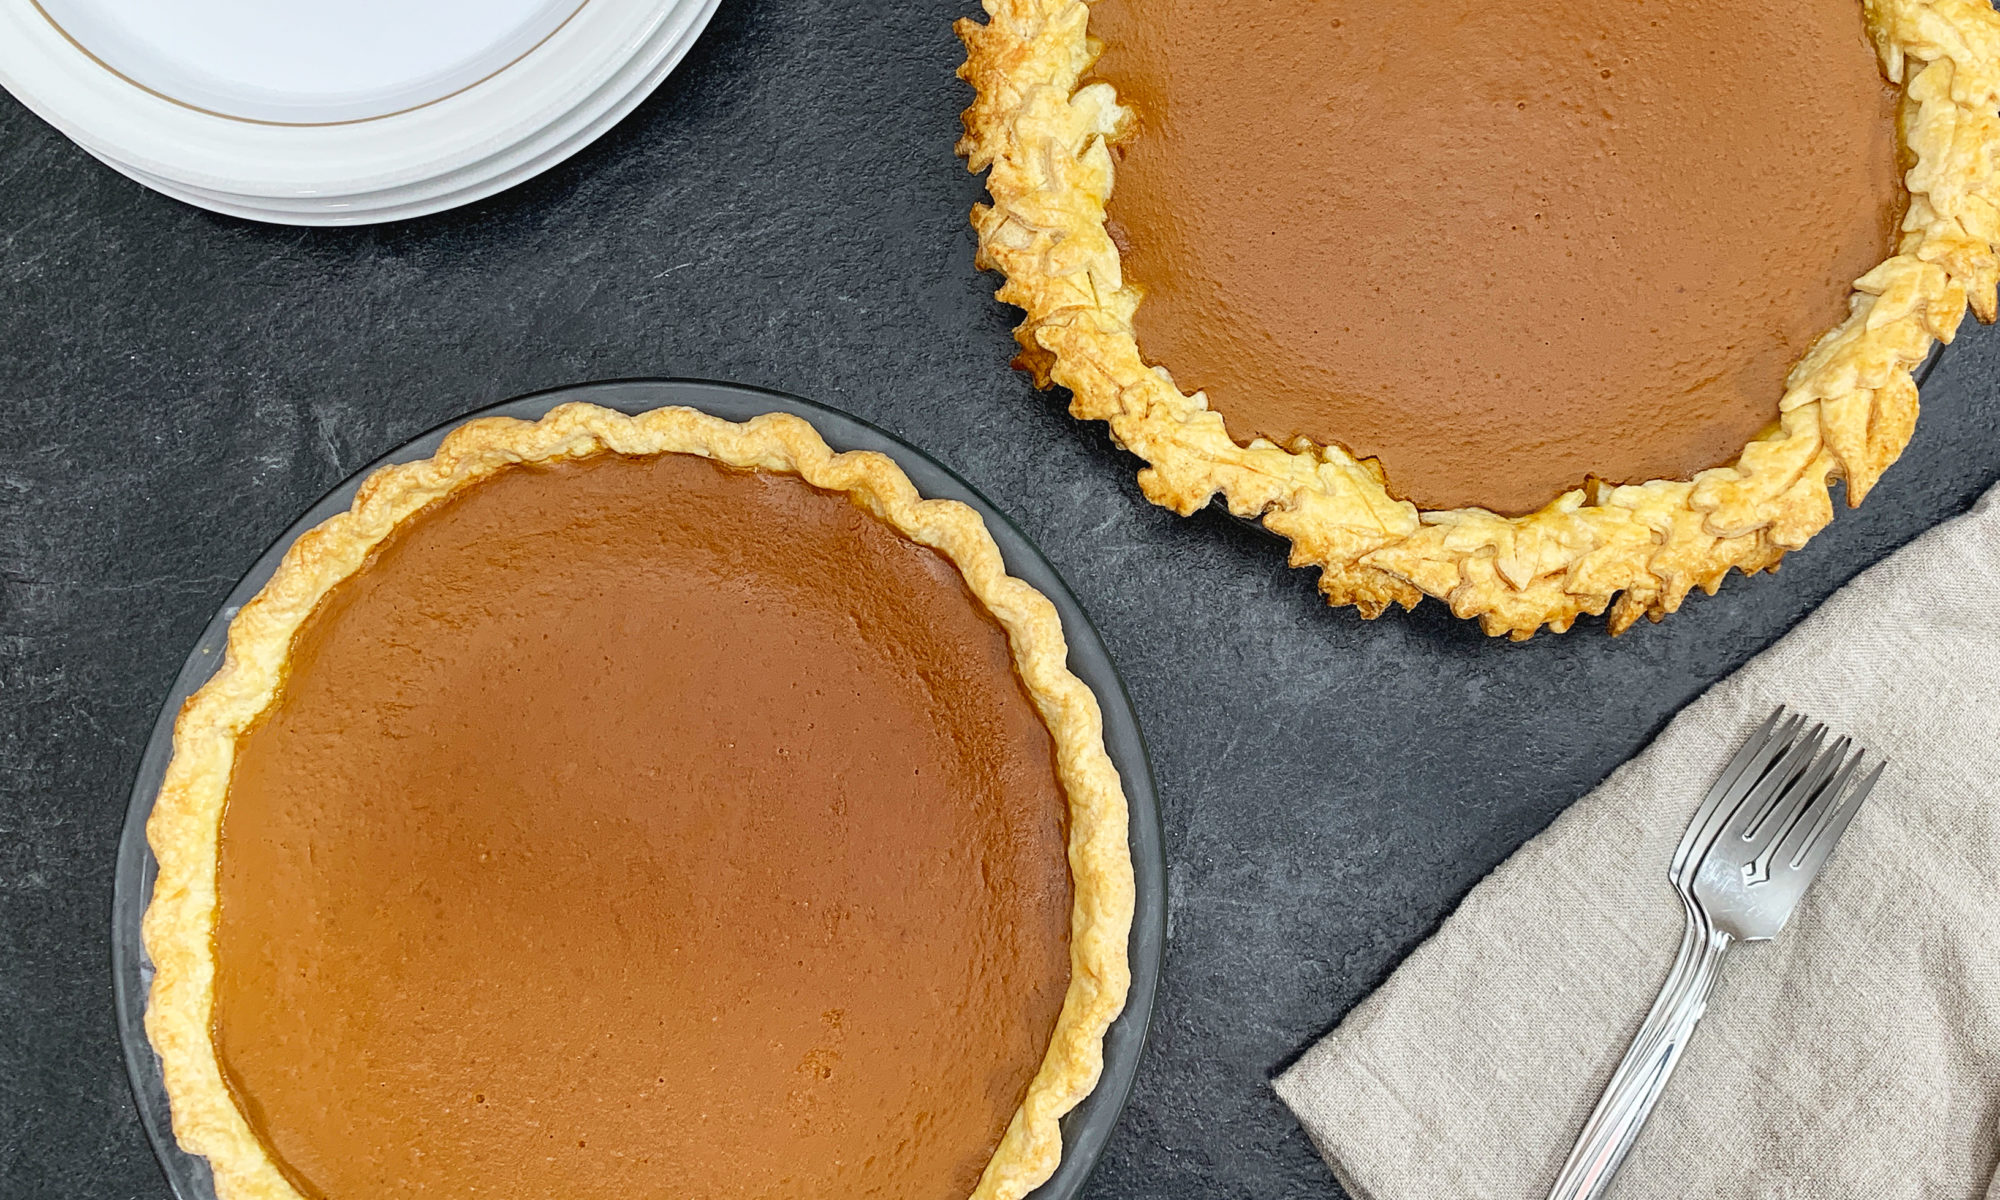
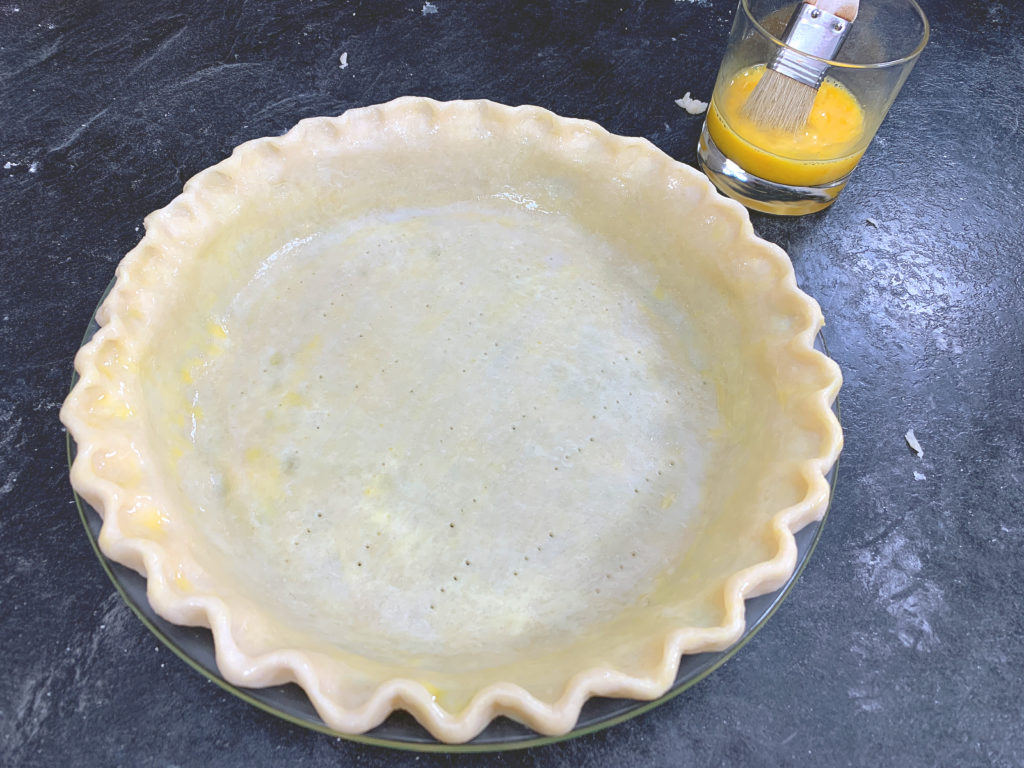
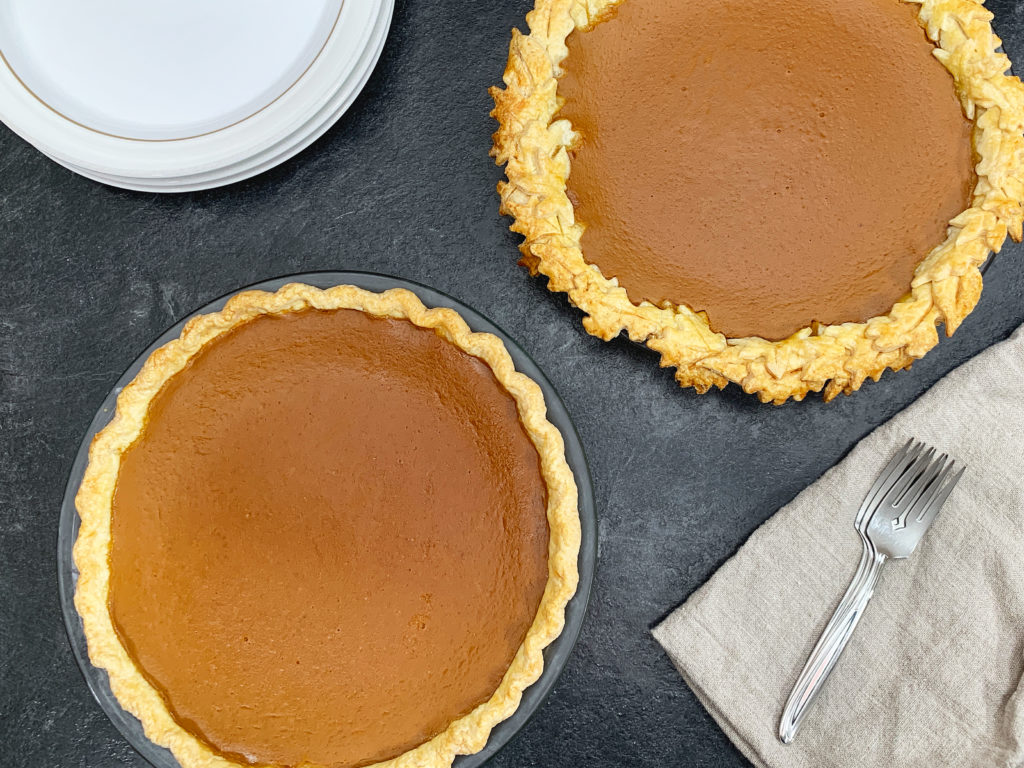
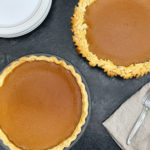
Since I was making two pies, I wanted to try two different crust edges. On the first pie, I trimmed back the excess pastry, leaving just over 1/4″ overhanging the edge of the pie plate.
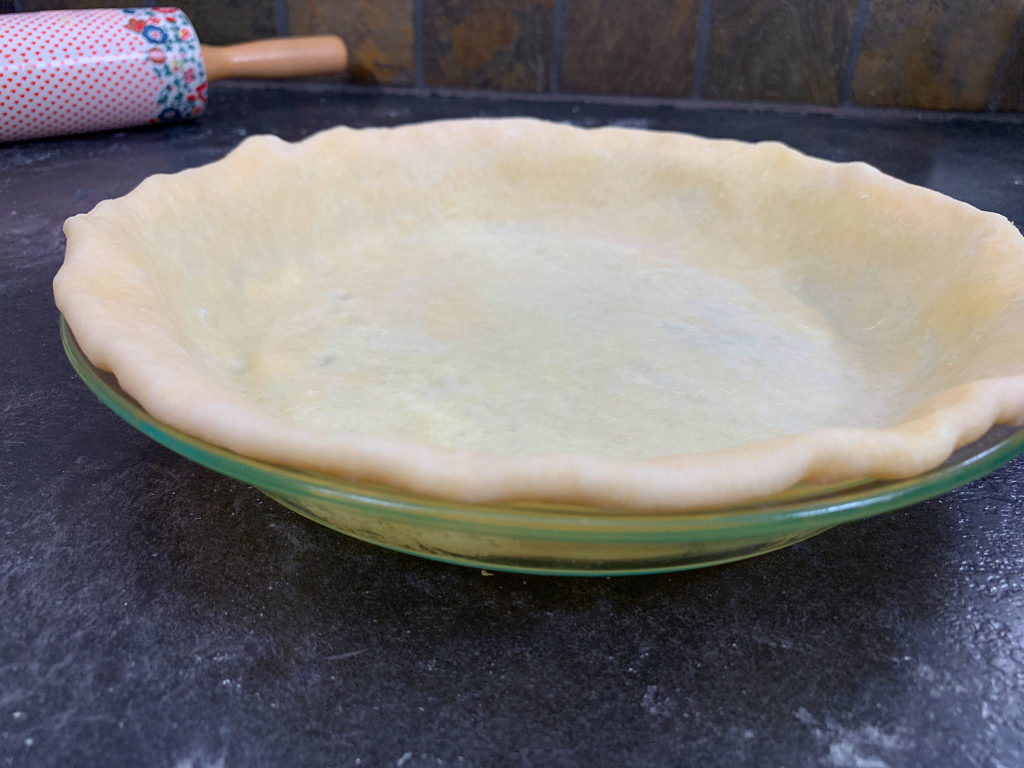
I folded the extra dough under itself and then pinched the edges to create a crimped scalloped edge. Tucking the dough under helps create a really nice, smooth edge on the crust. It also gives you a little extra dough to work with while sculpting your edge. Before adding the filling, I gave the whole crust a light egg wash as someone recommended to me that this might help prevent the crust from getting a soggy bottom.
For the second pie, I used cookies cutters to cut out a bunch of leaf shapes from the extra pastry. I used a knife to score some veins onto the pastry leaves to add a little texture.
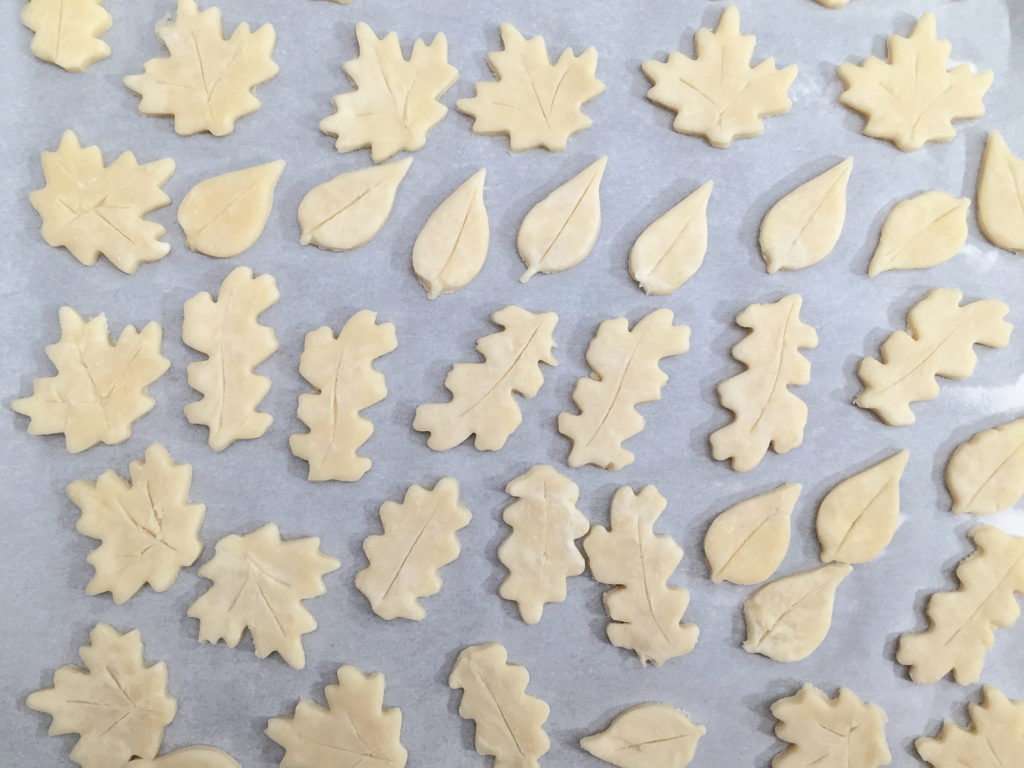
I pressed the leaves down along the entire edge of the pie and gave them an egg wash as well. Then the pies went into the oven for about an hour. You can tell if the pies are done by giving them a little jiggle. The filling should be firmed up around the edges, but still a little wobbly in the centre.
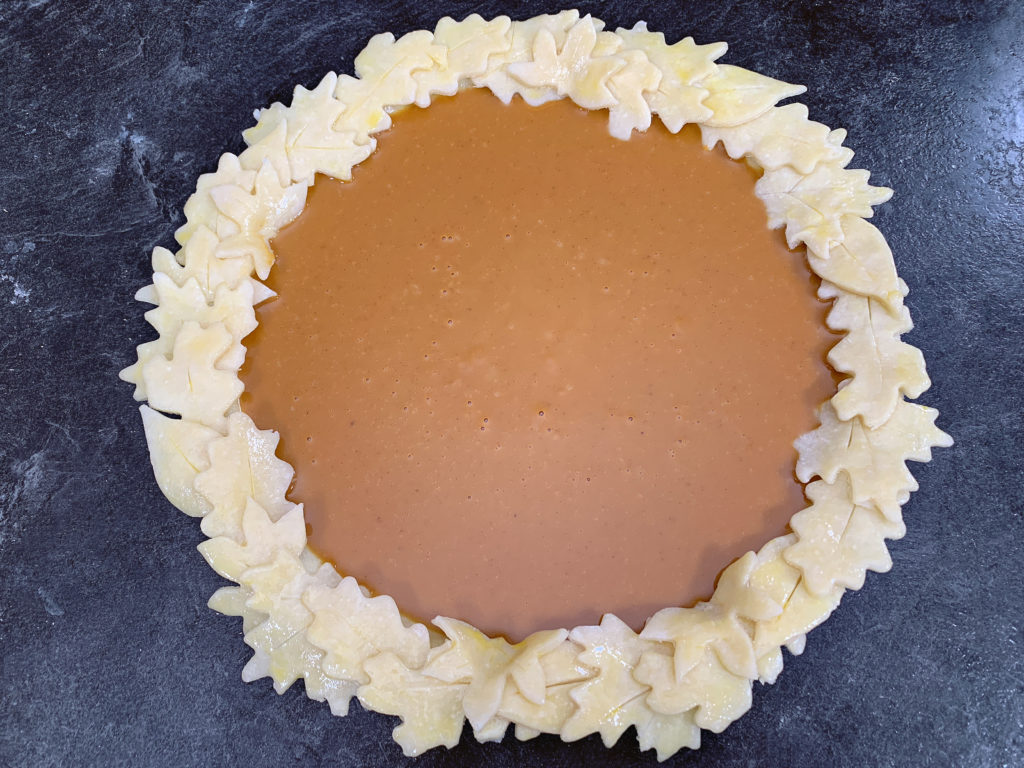
The pie with the leaf edge browned a little more in some parts, but luckily didn’t burn. While it was fun to try out, I found the leaves didn’t hold their shape as well as I had hoped. The crimped edge pie was a lot easier to make and has that nice classic pumpkin pie look. Overall the crust texture was okay, but I think still needs some work. It was a little dense, and not as tender and flakey as I would like. I will just have to keep making pies until I get it right.
Dad's Pumpkin Pie
Ingredients
- 2 x 9 inch deep dish tenderflake pie shells (or make your own pastry with your preferred recipe)
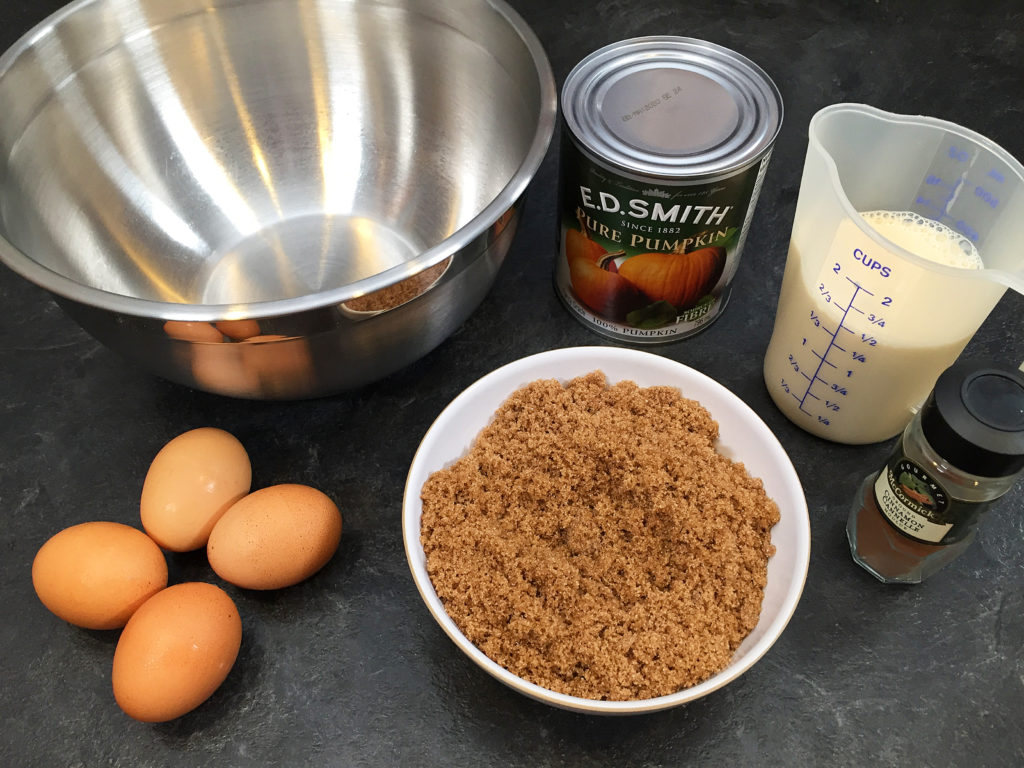
- 2 cans of 100% pure pumpkin (398ml/14fl oz each)
- 2 cups brown sugar
- 4 large eggs
- 1 1/2 cups evaporated milk
- 3 tsp vanilla extract
- 1/2 tsp cinnamon
- 1/4 tsp salt
Instructions
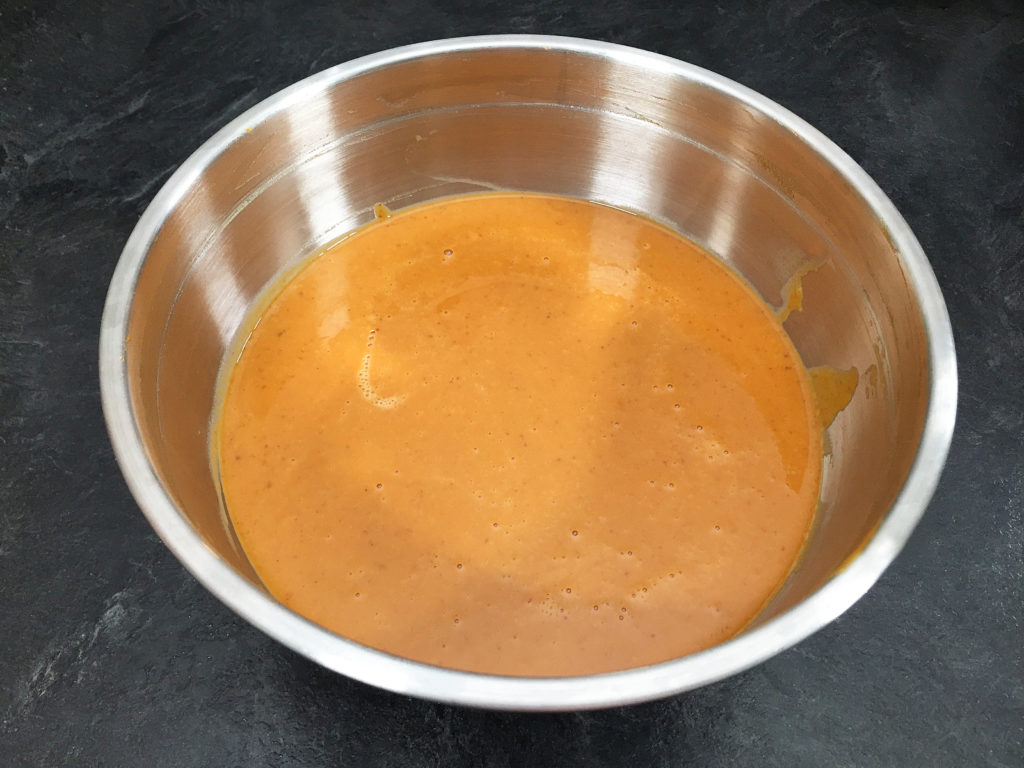
- In a medium sized bowl, mix the pumpkin and brown sugar together until smooth.
- Stir in the remaining ingredients until well combined.
- If possible, let the pumpkin mix stand in the fridge for 2-3 hours.
- Re-stir the mixture before pouring into the pie shells.
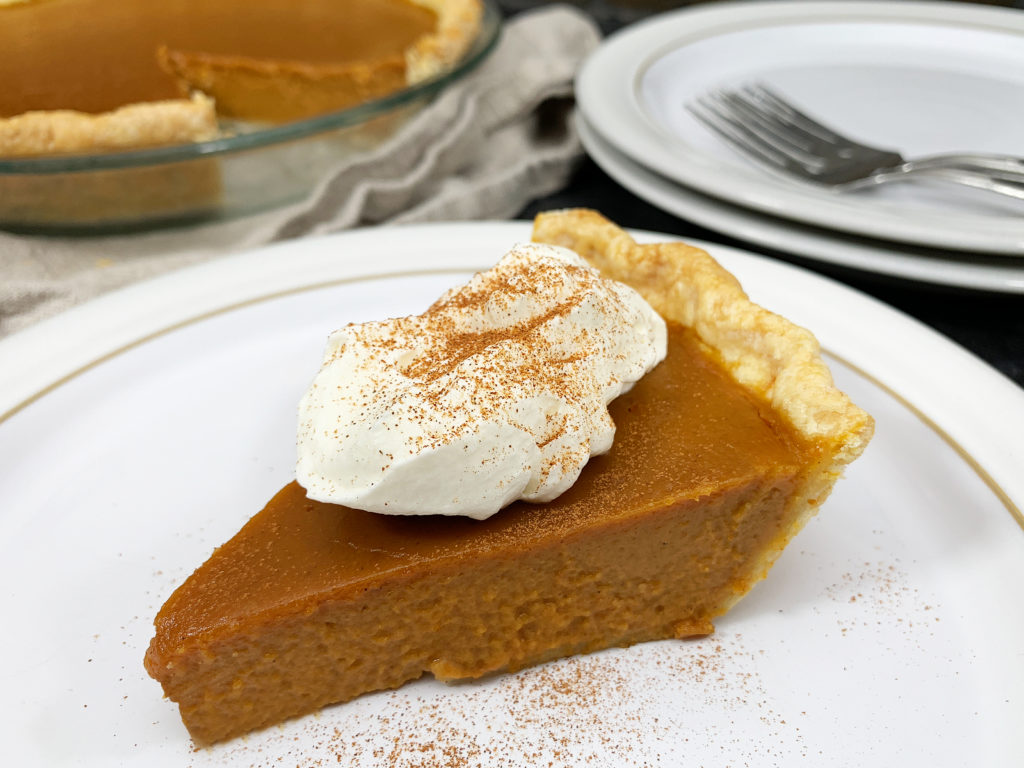
- Bake at 325°F for about 60 minutes. You can tell the pie is finished baking by giving it a gently nudge. The filling should appear set around outer edges, but still jiggle just slightly in the centre.
I rolled out thousands of pie crusts at the bakery with Dad – and I still don’t know the recipe for them! I wonder if that recipe could even scale down for the two or three pies we would make at home?
They look beautiful, Joan. You are more than making up for the hours of Family Business “Apprenticing” you missed. If he were here – and he didn’t think anyone was listening – he would tell you he was proud of you. ox
Probably the first recipe I have ever read that brought a tear to my eye 🙂